Hello dear Amigurumi Followers
Today we share Amigurumi Bear Circus Free Pattern for you. As you know we share new free amigurumi pattern every day. The main crochets are gazelle, amigurumi bear, pola, crochet panda, penguin, giraffe, llama, pig, bunny, clown, lamb, bee, crochet unicorn, amigurumi doll, fox, penguin, dinosaur, crochet elephant, hippo, monkey, crochet cat, crochet dog and more …
Todays daily new amigurumi free crochet pattern is Amigurumi Bear Circus.
I want to give you some informations about this amigurumi free pattern ; Bear Circus.
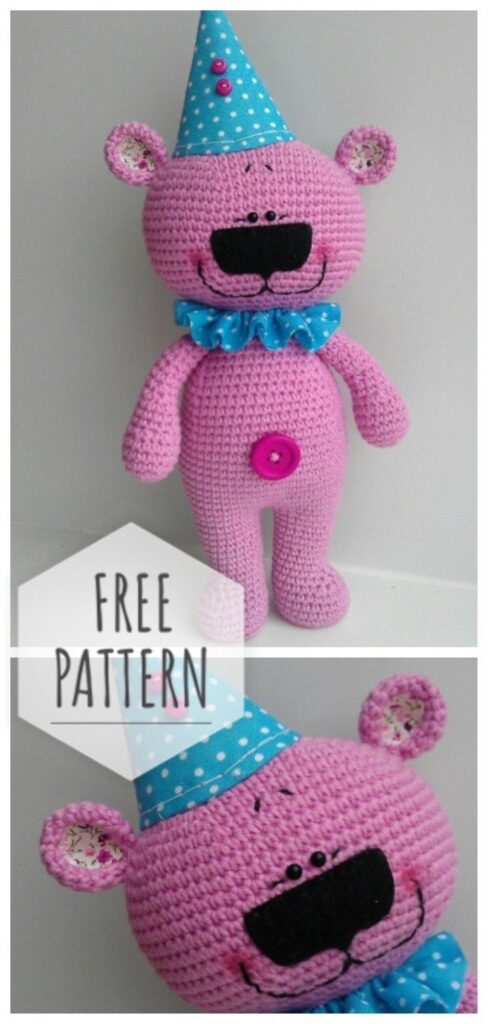
Amigurumi Bear Circus Free Pattern
Threads hb (YarnArt Jeans), hook number 2. The height of a bear without a cap is 21 cm.
Legs:
01. [sbn] x 6 into the ring of amigurumi
02. [approx.] X 6 (12 P)
03. [sbn, approx.] X 6 (18 P)
04. [2 sbn, approx.] X 6 (24 P)
05. [sbn only behind the back wall] until the end of the row (24 P)
At this stage, you need to cut the cardboard to the size of the foot
06-08. (3 rows) [sbn] to the end of the row (24 P)
09. 8 sbn, [4 sb.], 8 sbn (20 P)
Around here or in the next row we insert the cards into the legs and the toy will have a chance to stand.
10. 8 UBN, [2 ACC.], 8 UBN (18 P)
11. 8 UBN, UB., 8 UBN (17 P)
12-14. (3 rows) [sbn] until the end of the series (17 P)
15. 4 sbn, app., 7 sbn, approx., 4 sbn (19 P)
16-17. [cfc] to the end of the series (19 P)
18. 5 cfc, approx. 7 cfu, approx. 5 cfu (21 P)
19. [cfc] to the end of the row (21P)
20. 4 sbn., App., 11 sbn, approx., 4 sbn (23 P)
21. [sbn] to the end of the row (23p)
Do not forget that the legs need to be stuffed in the knitting process! Next we connect the legs, the author of the Laylachikov very lucidly wrote and wrote about it:
When tie the legs, put them together; feet should be directed away from you and slightly to the sides. Where the feet are in contact, connect them with a single crochet. This loop is the beginning of a new and subsequent series.
Tie 46 sbn around the perimeter of both legs, starting from the back, and you will be exactly on the connecting loop between the legs.
Torso, continue knitting:
22. 22 sbn, approx., 22 sbn, approx. (48 P)
23. [SAT] until the end of the series (48 S)
24. [11 SAT, app.] X 4 (52 S)
25. [Sr] until the end of the series (52 S)
26. [12 sbn, app.] X 4 (56 P)
27-30. (4 rows) [sbn] until the end of the series (56 P)
31. 13 sbn, sb., 26 sbn, sb., 13 sbn (54 P)
32. [sbn] until the end of the row (54 P)
33. [sb ., 16 sbn] x 3 (51 P)
34. [sbn] to the end of the series (51 P)
35. [ass., 15 sbn] x 3 (48 P)
36. [sbn] to the end of the row (48 P)
37. [UB, 14 UBN] x 3 (45 P)
38. [UB] until the end of the row (45 P)
39. [UB, 13 UB] x 3 (42 P)
40. [UB, 12 UBN ] x 3 (39 P)
41. [ass., 11 sbn] x 3 (36 P)
42. [ass., 10 sbn] x 3 (33 P)
43. [ass., 9 sb] x 3 (30 P)
44. [sb., 8 sbn] x 3 (27 P)
45. [sb., 7 sbn] x 3 (24 P)
46. [sb., 6 sbn] x 3 (21 P)
47. [ ass., 5 sbn] x 3 (18P)
All …
When I sewed on my head, my last row was completely covered with a seam, I love to have a tight head.
Girls, in the process of knitting the torso of the torso you can do this or spread the additions evenly over the row so that the torso does not turn out so-called stripes. And another thing: in every 4 rows of the body, I advise you to make a loop to the left, so that the marker is in the center of the body.
Head.
It fits like a regular oval, if you see that the strips of additions are shifted, you can make a loop shift, I am not strong in this and decided not to pay attention to it, and when I filled my head with a filler, I got a normal oval head.
1. Type 8 VP starting from the second loop from the hook 6 sbn, 3 sbn to the last, on the other side of the chain 5 sbn, increase (16P)
2. Approx., 5 Sat, 3 approx., 5 Sat, 2 approx. (22P)
3. Approx., 6 sat, approx., 1sbn, approx., 1sbn., Approx, 6sbn., Approx., 1sbn., Approx., 1sbn. (28 P)
4. Approx., 7bn, approx. 2sbn, approx. 2sbn., Approx, 7sbn., Approx., 2sbn., Approx., 2sbn. (34 П)
5. Prib., 8 sbn, prib., 3sbn, prib., 3sbn., Prib, 8sbn., Prib., 3sbn., Pp., 3sbn. (40 P)
6. Approx., 9 Sat, approx. 4b, approx. 4b, Appro, 9b, approx, 4b, approx, 4b. (46 P)
7. Approx., 10bn, approx., 5sbn, approx., 5sbn., Approx. 10sbn., Approx., 5sbn., Approx., 5sbn. (52 П)
8. Prib., 11 sbn, prib., 6sbn, prib., 6sbn., Prib, 11sbn., Prib., 6sbn., Pp., 6sbn. (58 P)
9. Approx., 12 Sat, approx., 7sbn, Approx., 7sbn., Approx, 12sbn., Approx., 7sbn., Approx., 7sbn. (64 П)
10. Approx. 13sbn, approx. 8sbn, approx. 8sbn., Approx, 12sbn., Appr., 8sbn., Approx. 8sbn. (70 P)
11.-20 (sbn) to the end of the series (70 P)
21. Ub., 13sbn, ub., 8sbn, ub., 8sbn., Ub, 13sbn., Ub., 8sbn., Ubs., 8sbn. (64П)
22. Уб ., 12 сбн, уб, 7сбн, member, 7сбн., Уб, 12сбн., Уб., 7сбн., Уб, 7сбн. (58П)
23. Уб ., 11 сбн, уб ., 6sbn, ub., 6sbn., Ub, 11sbn., Ub., 6sbn., Ub., 6sbn. (52 П)
24. Уб., 10 сбн, уб, 5сбн, уб, 5сбн., Уб, 10сбн., Уб., 5сбн., Уб, 5сбн (46П)
25. Уб ., 9 сбн, уб ., 4sbn, ass., 4sbn., Ass, 9sbn., Ass., 4sbn., Ass., 4sbn. (40P)
26. Ub., 8 sbn, ub., 3sbn, ub., 3sbn., Ub, 8sbn., Ub., 3sbn., Ub., 3sbn (34P)
27. Ub., 7 sbn, ub. , 2sbn, ub., 2sbn., Ub, 7sbn., Ub., 2sbn., Ub., 2sbn (28P)
28. Ub., 6bn, ub., 1sbn, ub., 1sbn., Ub, 6sbn. , Ub., 1sbn., Ub., 1sbn (22P)
29. Ub., 5sbn., (Ub) x 3, 5sbn., (ub.) x 2 (16P)
29.1sbn., Ub (11P)
30. do a slowdown before closing.
Hands
1. (Sbn) x 6 into the Amigurumi ring
2. ( approx .) X 6 (12 P)
3. (sbn, approx.) X 6 (18 P)
4 – 6. (sbn) until the end of the row (18 P )
7. 1 sb., Ub. x 6 (12P)
8 – 10. (sbn) to the end of the series (12 P)
11. 2 ass, 3 cbl., 2 ave., 3 cass. (12P)
Here added 1 more row.
12. 2 ass, 3 cbl., 2 pr., 3 cbl. (12P)
13. (UBN) to the end of the row (12 U)
14. 2 ass., 3 UBN., 2 ex., 3 UBN. (12P)
15. (sbn) to the end of the row (12 P)
16. 2 ass., 3 sbn., 2 ave., 3 sbn. (12P)
17. (Sbn) to the end of the row (12 P)
And here I added one more row.
18. 1sbn., Ub (6P)
19. do a decrease to the close.
You can try to make it easier: from 8 to 17 row – (sbn) to the end of the row (12 P), although then the handles will be smooth and not curved.
Ears.
1. (sbn) x 6 to the amigurumi ring
2. (appr.) X 6 (12 P)
3. (sbn, app.) X 6 (18 P)
4. (2sbn, app.) X 6 (24 P)
5. (sbn) to the end of the series (24 P)
6.. (2sbn, sb.) X 6 (18 P)
7. (1sbn, sb.) X 6 (12 P) We
fold the ear and make 3 drops on the inside (to pull it off a little.
At this stage it is better to sew a cloth into the eyelet, I sew the fabric on the already sewn ears, it is not convenient.
When sewing the ears to the head reduce the eye edges together to ears acquired a sticking whether that view is not entirely true medvezhachi ears are obtained, but funny.
Tail
1. (sbn) x 6 into the amigurumi ring
2. (appr.) X 6 (12 P)
3. (sbn, appr.) X 6 (18 P)
4. (sbn) until the end of the row (18 P).
Cut the thread, leaving a little thread for sewing, put a filler in the tail.
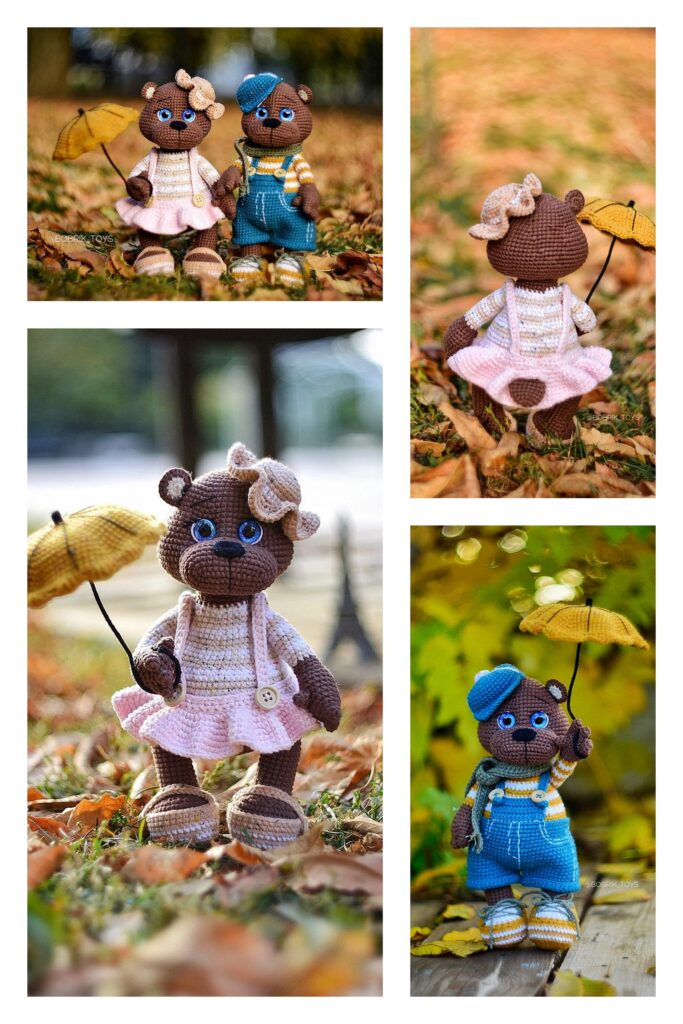
A cap made of thick paper rolled up the cone (by eye), sealed with a stapler, tried on, cut off the excess. For durability, the cap is plastered with adhesive tape, but it makes it difficult to flash the cap, so do not glue the adhesive plaster on the bottom where the seam will go. She wrapped the cap with a cloth. She cut out a circle of cloth, pulled it off, filled it with padding polyester – the pumpoon is ready, sew it on the cap.
Collar A strip of fabric 4 cm thick, 35 cm long folded in half and strung together on the very edge. Pull off to the right size and secured the bears on the neck.
Mordochka embroidered with black threads, eyes glued, cheeks – with lipstick (you can blush, but I would not see a bright pink bear and blush.)
If you wish, you can tie a cap and a collar, I didn’t think of it, Anna Ryzhova.
Knitted Cap (knit with the main color thread).
1. (sbn) x 6 into the amigurumi ring
2. (1 sbn, approx.) X 3 (9P)
3. (sbn) until the end of the row (9 P)
4. (2 sbn, approx.) X 3 (12 P )
5. (CBN) until the end of the row (12 P)
6. (3 CBN, approx.) X 3 (15 P)
7. (CBN) until the end of the row (15 P)
8. (4 CBN, approx.) X 3 (18 P)
9. (Sbn) to the end of the series (18 P)
10. (5 sbn, approx.) X 3 (21 P)
11. (Sbn) to the end of the series (21 P)
12. (6 sbn, app.) x 3 (24 P)
13. (CBN) until the end of the row (24 P)
14. (7 CBN, approx.) X 3 (27 P)
15. (CBN) until the end of the row (27 P)
16. (8 CBN, approx.) X 3 (30 P)
17. (Sbn) to the end of the series (30 P)
18. (9 sbn, approx.) X 3 (33P)
19. (Sbn) to the end of the series (33 P)
20. (10 sbn, approx. ) x 3 (36 P)
21. (CBN) to the end of the row (36 P)
22. (11 CBN, approx.) x 3 (39 P)
23. (CBN) to the end of the row (39 P)
24. (12 Crib, app.) x 3 (42 P)
25. (cbn) until the end of the series (42 P)
26. (13 cbn, approx.) x 3 (45P)
27. (Sbn) until the end of the row (45 P)
28 . (14 sbn, appr.) X 3 (48 P)
29. We knit a thread of a finishing color: (sbn) to the end of the row (48 P).
Thread to fasten, hide.
Collar (knit the main color thread).
1. Since we left 18 SBs uncovered around the bear’s neck and we’ll wear a collar and sew the head at the same time, we’ll pick up a little bit of VP chain than 18 SBNs. Namely, 22 VP, connect the SS.
2. 2 runways lifting, 2 SSNs in each SCN for both walls of the loop (44 P)
3. 2 runways lifting, 2 CCH in each SCN for both walls of the loop (88 P)
4. 2 runways lifting, 2 CCH in each sc for both walls of the loop (176 n)
5. We tie it with a thread of a finishing color to the end of the row (2 VP, sc), we connect, we hide the thread.
More Amigurumi Bear Ideas:
