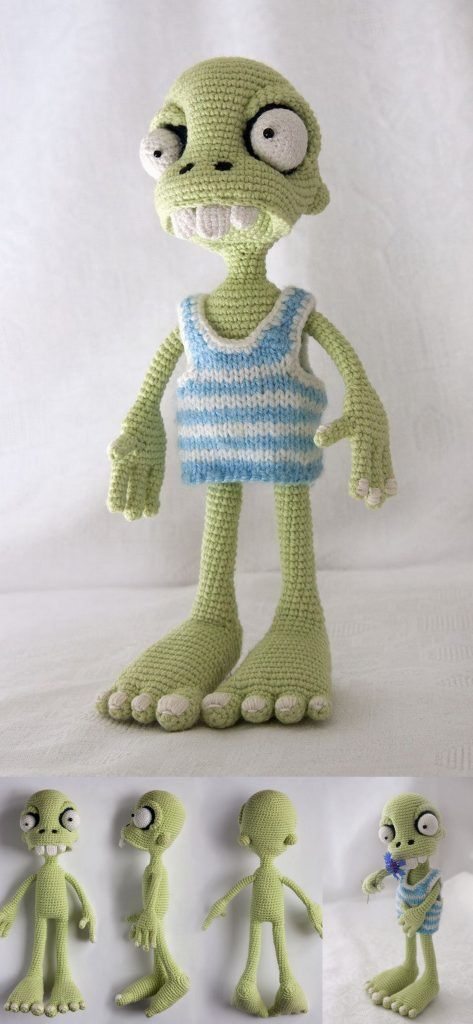
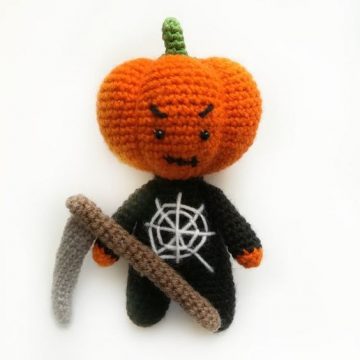
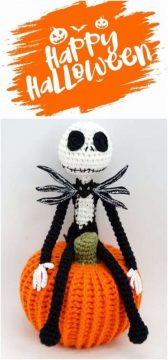
Hello dear Amigurumi Followers
Today we share Lulu the Witch Amigurumi Halloween CAL Free Pattern for you. As you know we share new free amigurumi pattern every day. The main crochets are gazelle, amigurumi bear, pola, crochet panda, penguin, giraffe, llama, pig, bunny, clown, lamb, bee, crochet unicorn, amigurumi doll, fox, penguin, dinosaur, crochet elephant, hippo, monkey, crochet cat, crochet dog and more …
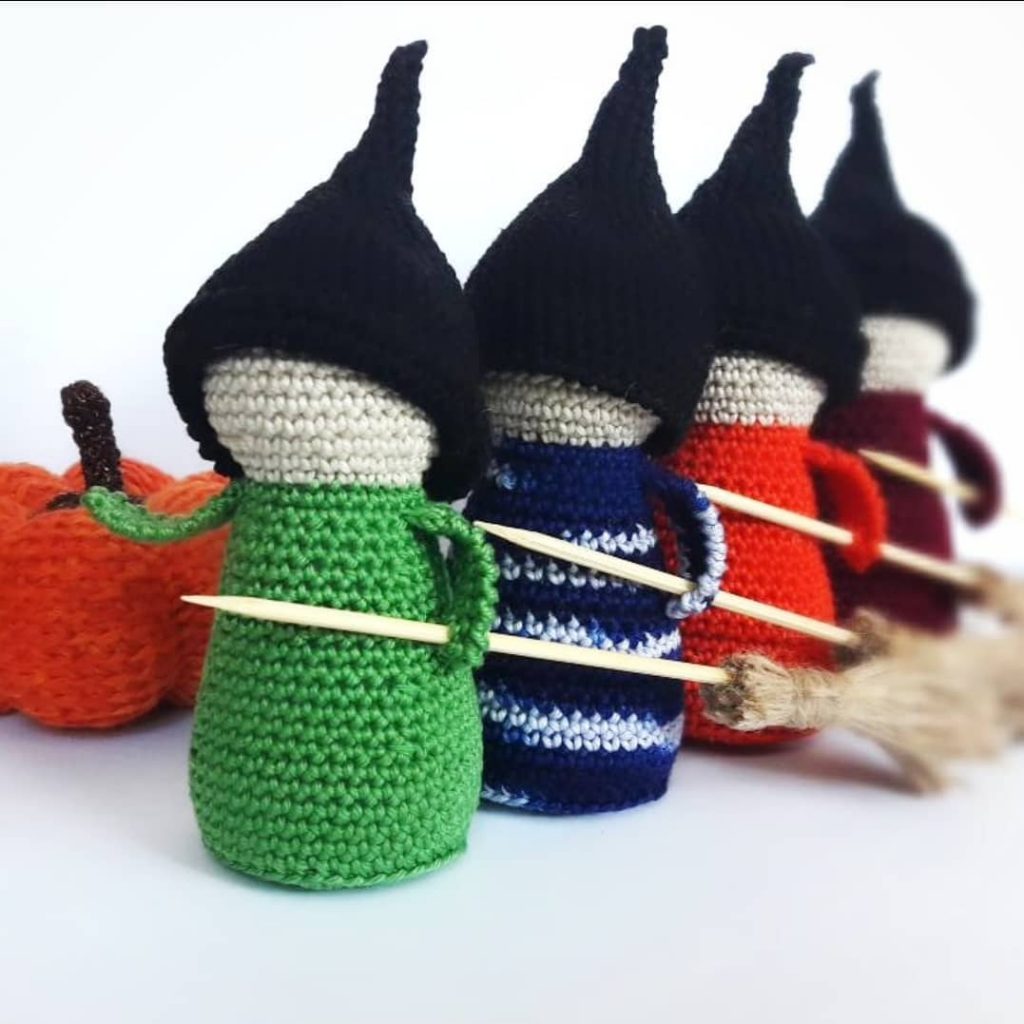
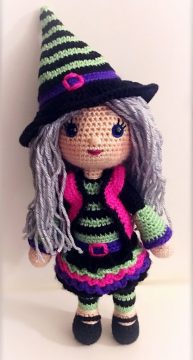
Todays daily new amigurumi free crochet pattern is Amigurumi Lulu the Witch.
I want to give you some informations about this amigurumi free pattern ; Lulu the Witch.

Halloween CAL
Lulu the Witch
Materials:- Worsted weight yarn in choice of 4 colors for the body, 1 skin tone, and 1 choice of hair color.- For my doll I used Caron Simply Soft in Black, Neon Green, Neon Pink and Iris for the outfit, Light Country Peach for the skin tone, and Silver Sparkle for the hair.- Hook size: 3.25mm (D) or appropriate hook size for yarn choice.- 2 x 12mm safety eyes.- Embroidery floss for eyelashes and mouth.- Yarn needle- Poly-fil
This doll is designed with a built in neck support so you will not need any additional materials for this.
Gather your materials this week so you’re ready to go!
Stitch abbreviations
Ch: chain
MR: magic ring
Slst: slip stitch
St(s): stitch(es)
Sc: single crochet
Hdc: Half Double Crochet
Dc: double crochet
Inc: increase
Dec: decrease
(): repeat same stitches
FLO: crochet in front loop only
BLO: crochet in back loop only
Sk: skip
FO: fasten off
Special stitches used
5 dc bobble stitch:
· Step 1: Yarn over, insert hook into st, yarn over again & pull up loop, yarn over, draw back through 2 loops. (2 loops)
· Step 2: Yarn over, insert hook into same st, yarn over again & pull up loop, yarn over, draw through 2 loops (3 loops)
· Step 3: Yarn over, insert hook into same st, yarn over again & pull up loop, yarn over, draw through 2 loops (4 loops)
· Step 4: Yarn over, insert hook into same st, yarn over again & pull up loop, yarn over, draw through 2 loops (5 loops)
· Step 5: Yarn over, insert hook into same st, yarn over again & pull up loop, yarn over, draw through 2 loops (6 loops)
· Step 6: Yarn over, draw yarn through all 6 loops on hook.
*Pattern is worked in continuous rounds unless noted otherwise*
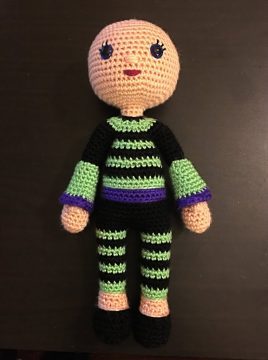
Lulu the Witch Amigurumi Halloween CAL Free Pattern
Part 1:
Arms
(Make 2 – starting in skin tone)
R1: 6 sc in MR (6)
R2: sc inc x 6 (12)
R3: (3 sc, sc inc) x 3 (15)
R4-6: 15 sc (15)
R7: 7 sc, bobble (see special stitches), 7 sc (15)
R8: (1 sc, sc dec) x 5 (10)
R9-16: 10 sc (10) Change to black on the last st of R16.
R17: 10 sl st BLO (10)
R18: 10 sc BLO (10)
R19-26: 10 sc (10)
FO.
Sleeves
Holding arm upside down, join green yarn to FLO of R18.
Stuff as you go.
R1: 10 sc FLO (10)
R2: (4 sc, sc inc) x 2 (12)
R3: 12 sc (12)
R4: (3 sc, sc inc) x 3 (15)
R5: 15 sc (15)
R6: (4 sc, sc inc) x 3 (18)
R7: 18 sc (18)
R8: (5 sc, sc inc) x 3 (21)
R9: 21 sc (21) Change to purple on the last st of this round.
R10-11: 21 sc (21)
FO & weave in ends.
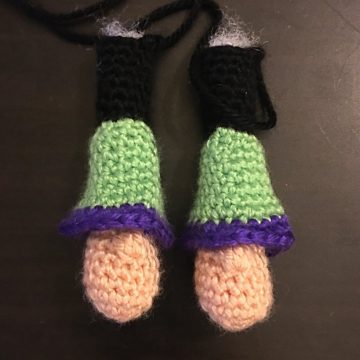
Legs
(Make 2 – starting in black)
Stuff as you go.
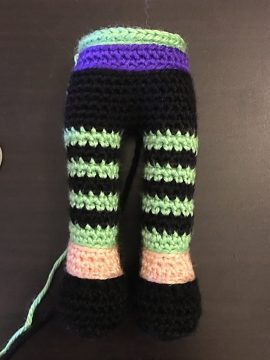
R1: Ch 6, sc in 2nd ch from hook, 3 sc, [sc x 3] in last ch. Working on the other side of the ch: 3 sc, sc inc (12)
R2: sc inc, 3 sc, sc inc x 3, 3 sc, sc inc x 2 (18)
R3: (2 sc, sc inc) x 6 (24)
R4: 24 sc BLO (24)
R5-6: 24 sc (24)
R7: 6 sc, hdc dec x 6, 6 sc (18) Change to skin tone on the last st of this round.
R8: 18 sl st BLO (18)
R9: 18 sc BLO (18)
R10: sc dec, 4 sc, sc dec x 3, 6 sc (14)
R11: 14 sc (14) Change to green on the last st of this round.
R12: 14 sl st BLO (14)
R13: 14 sc BLO (14)
R14: 14 sc (14) Change to black on the last st of this round.
R15-16: 14 sc (14) Change to green on the last st of R16.
R17-18: 14 sc (14) Change to black on the last st of R18.
R19-20: 14 sc (14) Change to green on the last st of R20.
R21-22: 14 sc (14) Change to black on the last st of R22.
R23: 14 sc (14)
R24: (6 sc, sc inc) x 2 (16). Change to green on the last st of this round.
R25-26: 16 sc (16)
R27: 9 sc OR until you reach the inside center st with the feet facing away from you. This is a partial round. (9)
FO the 1st leg but not the 2nd. Tomorrow you will join the legs and continue on to the body.
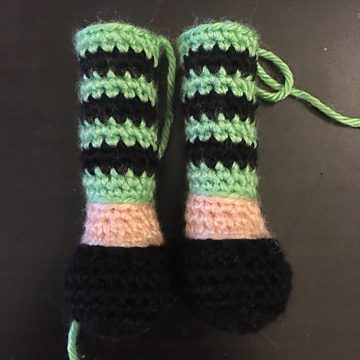
Shoe Straps
Start with a long tail, ch 8, FO with a long tail. Use the tails on either side to sew to the shoes.
Part 2:
Body
Change color to BLACK – continue from where you left off on the 2nd leg.
Stuff as you go.
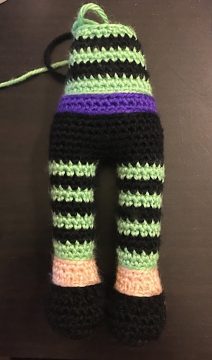
R1: Ch 2, 16 sc around the 1st leg, sc in ch 2, 16 sc around the 2nd leg, sc in the other side of ch 2 (36)
R2-6: 36 sc (36)
R7: 7 sc, sc dec, 16 sc, sc dec, 9 sc (34) Change to purple on the last st of this round.
R8: 34 sl st BLO (34)
R9: 34 sc BLO (34)
R10: 34 sc (34) Change to green on the last st of this round.
R11: 34 sl st BLO (34)
R12: 34 sc BLO (34)
R13: 10 sc, sc dec, 15 sc, sc dec, 5 sc (32) Change to black on the last st of this round.
R14: 32 sc (32)
R15: 10 sc, sc dec, 14 sc, sc dec, 4 sc (30) Change to green on the last st of this round.
R16: 30 sc (30)
R17: (8 sc, sc dec) x 3 (27) Change to black on the last st of this round.
R18: 27 sc (27)
R19: (7 sc, sc dec) x 3 (24) Change to green on the last st of this round.
R20: 24 sc (24)
R21: (2 sc, sc dec) x 6 (18) Change to black on the last st of this round.
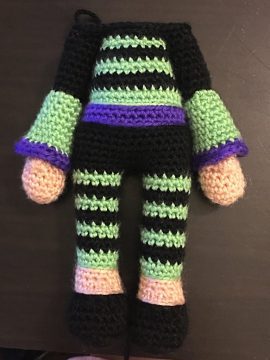
It’s easier to add the skirt and ruffles BEFORE you join the arms. So stop here and do the skirt if you’d like, then continue. (See skirt instructions below this section)
R22: Join arms: 8 sc (or until you reach the correct arm position, adjust if necessary, then continue as written), 10 sc around the 1st arm, 9 sc, 10 sc around the 2nd arm, end with 1 sc (38)
R23: 38 sc (38) Change to green on the last st of this round.
R24: 6 sc, sc dec, (4 sc, sc dec) x 5 (32)
R25: (2 sc, sc dec) x 8 (24) Change to black on the last st of this round.
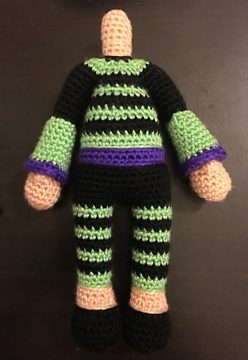
R26: sc dec x 12 (12) Change to skin tone on the last st of this round.
R27: 12 sl st BLO (12)
R28: 12 sc BLO (12)
R29: 12 sc (12)
R30: 12 sc BLO (12)
R31-34: 12 sc (12)
Stuff the neck firmly.
R35: sc dec x 6 (6)
FO with long tail for sewing. Whip stitch FLO and pull tight to close. Hide ends.
Skirt
Join black yarn to FLO of R7.
R1: 34 sc (34)
R2: (16 sc, sc inc) x 2 (36)
R3: 36 sc BLO (36)
R4: (8 sc, sc inc) x 4 (40)
R5: 40 sc BLO (40)
R6: (9 sc, sc inc) x 4 (44)
R7: 44 sc BLO (44)
R8: (10 sc, sc inc) x 4 (48)
R9: 48 sc BLO (48)
R10: (11 sc, sc inc) x 4 (52)
R11: In FLO, 3 dc in each st around (156)
FO & weave in ends.
Skirt ruffles
Ruffle 1: Join purple yarn to FLO of R8, 3 dc in each st around (144)
FO & weave in ends.
Ruffle 2: Join pink yarn to FLO of R6, 3 dc in each st around (132)
FO & weave in ends.
Ruffle 3: Join green yarn to FLO of R4, 3 dc in each st around (120)
FO & weave in ends.
Ruffle 4: Join black yarn to FLO of R2, 3 dc in each st around (108)
FO & weave in ends.
Part 3:
Head
Join skin tone yarn to FLO of R29.
Stuff as you go.
R1: 12 sc (12)
R2: sc inc x 12 (24)
R3: (2 sc, sc inc) x 8 (32)
R4: (3 sc, sc inc) x 8 (40)
R5: (4 sc, sc inc) x 8 (48)
R6: (7 sc, sc inc) x 6 (54)
R7-16: 54 sc (54)
Insert safety eyes between R12-13, 8 sts apart.
R17: (7 sc, sc dec) x 6 (48)
R18: (6 sc, sc dec) x 6 (42)
R19: (5 sc, sc dec) x 6 (36)
R20: (4 sc, sc dec) x 6 (30)
R21: (3 sc, sc dec) x 6 (24)
R22: (2 sc, sc dec) x 6 (18)
R23: (1 sc, sc dec) x 6 (12)
R24: sc dec x 6 (6)
FO with long tail for sewing. Whip stitch FLO and pull tight to close. Hide ends.
– Add eyelashes to using black embroidery floss.
– Stitch a nose between R10-11 of the head.
– Embroider a mouth between R8-9 of the head.
Part 4:
Hair cap
(Make 1 – in hair color)
R1: 6 sc in MR (6)
R2: sc inc x 6 (12)
R3: (1 sc, sc inc) x 6 (18)
R4: (2 sc, sc inc) x 6 (24)
R5: (3 sc, sc inc) x 6 (30)
R6: (4 sc, sc inc) x 6 (36)
R7: (5 sc, sc inc) x 6 (42)
R8: (6 sc, sc inc) x 6 (48)
R9: (7 sc, sc inc) x 6 (54)
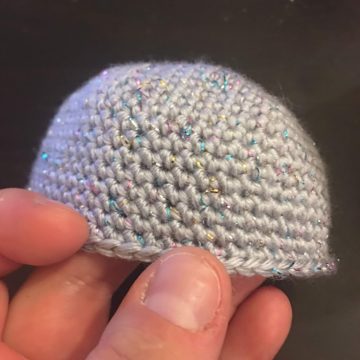
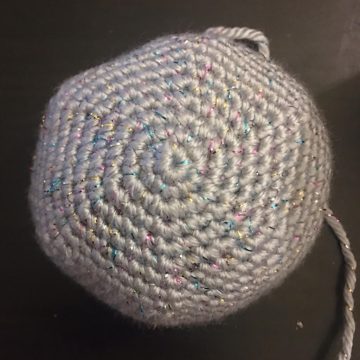
R10-19 (or until the hair cap fits as desired): 54 sc (54)
FO, leaving long tail for sewing. Move on to attach hair to the hair cap.
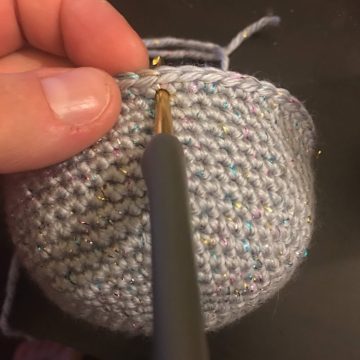
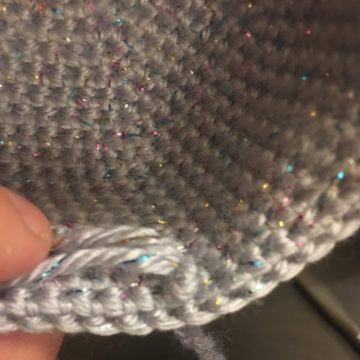
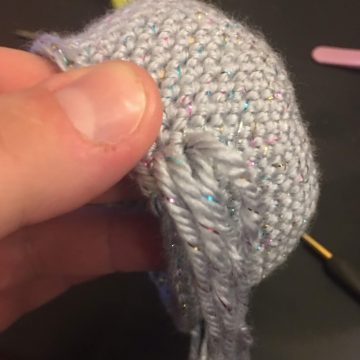
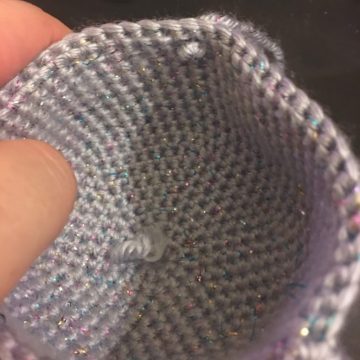
Below are photos of one way I like to add hair to a hair cap.
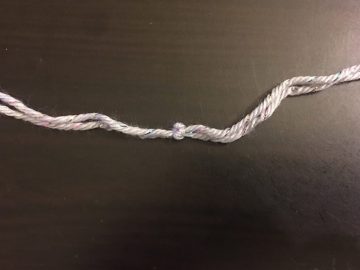
Start with 2 cut lengths of yarn. Double knot them together. Insert hook into the top of the hair cap, and pull one strand of yarn through until the knot stops it from coming any further. Then insert hook into an adjacent hole between sts on the the hair cap, and pull another strand through. Repeat 2 more times so you now have 4 strands of hair in 4 holes. This method will prevent the hair from ever coming out of the hair cap.
TIP – When adding hair, always fill out the front and the middle top of the head, and then space out each 4 strands of hair by 3-4 sts as you go around the head. If you add too much hair the head will be too heavy. If you need to, you can always go back and fill in later.
Once you have added enough hair, sew the hair cap on to the head. Trim up and neaten the hair.
Part 5:
Vest
(Make 1 – starting in pink)
R1: Ch 25, sc in 2nd ch from hook, 23 sc, ch 2, turn (24)
R2: dc inc x 24, ch 2, turn (48)
R3: 4 dc, ch 2, sk 13, 14 dc, ch 2, sk 13, 4 dc, ch 2, turn (26: 22 + 4 ch)
R4-8: 26 dc, ch 2, turn (26)
R9: Using black, sc around the vest, working on the top and bottom and the sides to add the black edging.
FO & weave in ends.
Hat
(Make 1 – starting in green)
R1: 4 sc in MR (4)
R2: (1 sc, sc inc) x 2 (6) Change to black on the last st of this round.
R3: 6 sc (6)
R4: (1 sc, sc inc) x 3 (9) Change to green on the last st of this round.
R5: 9 sc (9)
R6: (2 sc, sc inc) x 3 (12) Change to black on the last st of this round.
R7: 12 sc (12)
R8: (3 sc, sc inc) x 3 (15) Change to green on the last st of this round.
R9: 15 sc (15)
R10: (2 sc, sc inc) x 5 (20) Change to black on the last st of this round.
R11: 20 sc (20)
R12: (3 sc, sc inc) x 5 (25) Change to green on the last st of this round.
R12: 25 sc (25)
R13: (4 sc, sc inc) x 5 (30) Change to black on the last st of this round.
R14: 30 sc (30)
R15: (5 sc, sc inc) x 5 (35) Change to green on the last st of this round.
R16: 35 sc (35)
R17: (6 sc, sc inc) x 5 (40) Change to black on the last st of this round.
R18: 40 sc (40)
R19: (7 sc, sc inc) x 5 (45) Change to green on the last st of this round.
R20: 45 sc (45)
R21: (8 sc, sc inc) x 5 (50) Change to black on the last st of this round.
R22: 50 sc (50)
R23: (9 sc, sc inc) x 5 (55) Change to purple on the last st of this round.
R24: 55 sl st BLO (55)
R25: 55 sc BLO (55)
R26: (10 sc, sc inc) x 5 (60) Change to black on the last st of this round.
R27: 60 sl st BLO (60)
R28: 60 sc BLO (60)
R29: In FLO, sl st 1st st, ch 2, (5 dc, dc inc) x 10, sl st join to 1st dc (70)
R30: Ch 2, (6 dc, dc inc) x 10, join to 1stdc (80)
R31: Ch 2, (7 dc, dc inc) x 10, join to 1stdc (90)
FO & weave in ends.
Finishing
– Add details to the face if you haven’t yet.
– Using pink yarn, add a buckle to the belt and to the hat.
More Amigurumi Halloween Toy Ideas:
