
Hello dear Amigurumi Followers
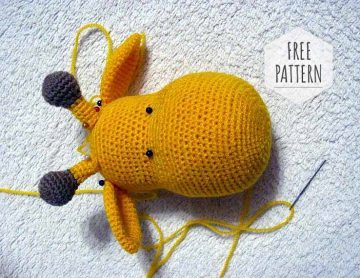
Today we share Amigurumi Lovely Giraffe Free Pattern for you. As you know we share new free amigurumi pattern every day. The main crochets are gazelle, amigurumi bear, pola, crochet panda, penguin, giraffe, llama, pig, bunny, clown, lamb, bee, crochet unicorn, amigurumi doll, fox, penguin, dinosaur, crochet elephant, hippo, monkey, crochet cat, crochet dog and more …
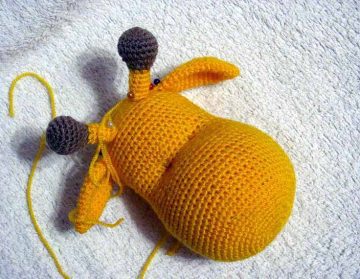
Todays daily new amigurumi free crochet pattern is Amigurumi Lovely Giraffe.
I want to give you some informations about this amigurumi free pattern ; Lovely Giraffe.

Complexity: Medium
Working time: 1 day
Materials: Yarn, hollofayber, hook, synth, pins, cotton yarn, acrylic yarn
I’ve prepared a description of a crocheted giraffe.
In my opinion, I have a very good image of a cute soft toy.
In the course of work on the description I have turned out here such wonderful girafchik by height 45 sm.

For the work I used:
-Acrylic yarn (100 g-400 m) of different colors;
-Hook of suitable size;
-Synth for stuffing;
-Pins for fitting parts;
-Embroidery needle with wide ear and blunt end for stitching parts.
Reduce:
RVN-a column without a scale;
Prib-Increment (2 in one loop of the base);
UB-Ubava (2 to get together for the front walls of loops).
Amigurumi Lovely Giraffe Free Pattern
Head.
Yellow thread.
1 row: In the ring 6 SBN = 6
2 row: 6 Prib = 12
3 row: (SB, prib) х6 = 18
4 row: (2 SBN, prib) х6 = 24
5 row: (3 SBN, prib) х6 = 30
6 row: (4 SBN, prib) х6 = 36
7 row: (5 SBN, prib) х6 = 42
8 row: (6 SBN, prib) х6 = 48
9 row: (7 SBN, prib) х6 = 54
10 row: (8 SBN, prib) х6 = 60
11 Row: (9 SBN, prib) х6 = 66
12-22 Rows: 66
23 Row: (9 SBN, UB) х6 = 60
24 row: (8 SBN, UB) Х6 = 54
25 Row: (7 SBN, ub) х6 = 48
26 Row:(6 SBN, ub) Х6 = 42
27-35 rows: 42
36 Series: (5 SBN, ub) Х6 = 36
37 Series: (4 SBN, ub) Х6 = 30
38 Series: (3 SBN, UB) Х6 = 24
39 Series: (2 SBN, ub) х6 = 18
40 Series: (SBN, UB) Х6 = 12
41 Series: 6 UB
Tighten, fasten and trim the thread.
Horns (2 parts)
Gray Thread.
1 row: In the ring 6 SBN = 6
2 row: 6 Prib = 12
3 row: (SB, prib) х6 = 18
4-6 rows: 18 SBN
7 row: (SBN, UB) Х6 = 12
8 row: (2 SBN, ub) Х3 = 9
Change the thread to yellow, continue knitting yellow thread.
9-14 Rows: 9 SBNFasten and trim the thread, leaving the end for the stitching.
Ears (2 parts)
Yellow thread
1 row: In the ring 6 SBN = 6
2 row: (SB, prib) х3 = 9
3 row: (2 SBN, prib) х3 = 12
4 row: (3 SBN, prib) х3 = 15
5 row: (4 SBN, prib) х3 = 18
6 row: (5 SBN, prib) х3 = 21
7-13 rows: 21 SBN
14 row: (5 SBN, UB) х3 = 18
15 Row: (4 SBN, ub) х3 = 15
16 Row: (3 SBN, UB) Х3 = 12
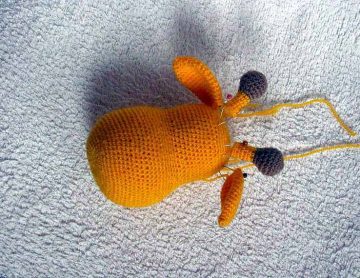
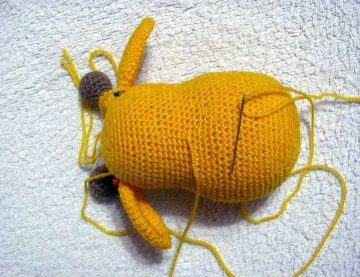
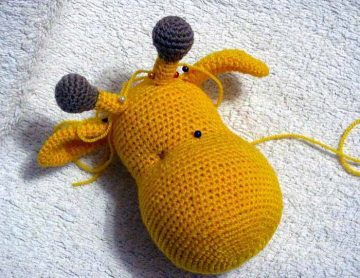
Fasten and trim the thread, leaving the end for the stitching.That’s how the head gets. Horns and ears are nailed with pins in approximately the places where they will be nailed.
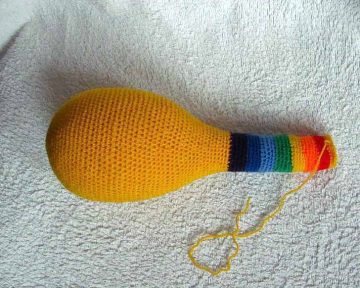
Torso.
1 row: In the ring 6 SBN = 6
2 row: 6 Prib = 12
3 row: (SB, prib) х6 = 18
4 row: (2 SBN, prib) х6 = 24
5 row: (3 SBN, prib) х6 = 30
6 row: (4 SBN, prib) х6 = 36
7 row: (5 SBN, prib) х6 = 42
8 row: (6 SBN, prib) х6 = 48
9 row: (7 SBN, prib) х6 = 54
10 row: (8 SBN, prib) х6 = 60
11 Row: (9 SBN, prib) х6 = 66
12 row: (10 SBN, prib) х6 = 72
13 row: (11 SBN, prib) х6 = 78
14-29 rows: 78
30 Row: (11 SBN, UB) Х6 = 72
31-33 Rows: 72
34 Series: (10 SBN, UB) Х6 = 66
35-37 Rows: 66
38 Series: (9 SBN, UB) х6 = 60
39-40 Series: 60 SBN
41 Series: (8 SBN, UB) Х6 = 54
42-43 rows: 54
44 Series: (7 SBN, ub) х6 = 48
45-46 rows: 48
47 Series: (6 SBN, ub) Х6 = 42
48 Series: 42
49 Series: (5 SBN, ub) Х6 = 36
50 Row: 36
51 Series: (4 SBN, ub) Х6 = 30
52-53 Series: 30 SBN
Change the thread to purple:
54-57 rows: 30 SBN
Change the thread to blue:
58-61 rows: 30 SBN
Change the thread to the blue:
62-65 rows: 30 SBN
Change the thread to green:
66-69 rows: 30 SBN
Change the thread to yellow:
70-73 rows: 30 SBN
Change the thread to Orange:
74-77 rows: 30 SBN
Change the thread to red:
78-81 rows: 30 SBN
Change the thread to yellow:
82-83 rows: 30 SBN
Thread tighten and trim, leaving the end for the stitching.
Tail
Yellow thread:
1 row: In the ring 6 SBN = 6
2 row: (SB, prib) х3 = 9
3-4 Series: 9 SBN
Change the thread to purple:
5-7 Rows: 9 SBN
Change the thread to blue:
8-10 Rows: 9 SBN
Change the thread to the blue:
11-13 Rows: 9 SBN
Change the thread to green:
14-16 Rows: 9 SBN
Change the thread to yellow:
17-19 Rows: 9 SBN
Change the thread to Orange:
20-22 Rows: 9 SBN
Change the thread to red:
23-25 Rows: 9 SBN
Change the thread to yellow:
26 Row: 9 SBN
Thread tighten and trim, leaving the long end for stitching. This end we will also perform a duck navel.
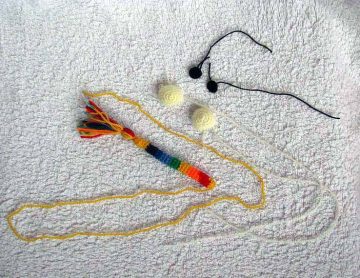
Eyes
Proteins (2 parts)
White thread:
1 row: In the ring 6 SBN = 6
2 row: 6 Prib = 12
3 row: (SB, prib) х6 = 18
4-5 rows: 18 SBN
Fix and trim the thread. The end is left long – by them and by the glare on pupils, and we will send eyes to a head.
Pupils (2 parts)
Black Thread:
1 row: In the ring 6 SBN = 6
2 row: 6 Prib = 12
Fix and trim the thread. The length of the tail should be enough to sew the pupil to the squirrel.
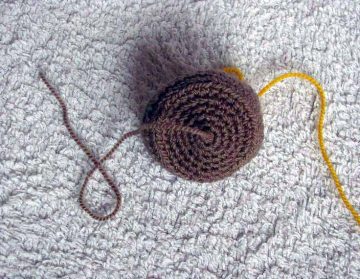
Hind legs (2 parts)
Gray thread:
1 row: In the ring 6 SBN = 6
2 row: 6 Prib = 12
3 row: (SB, prib) х6 = 18
4 row: (2 SBN, prib) х6 = 24
5 row: (3 SBN, prib) х6 = 30
6 row: (4 SBN, prib) х6 = 36
7 row: (5 SBN, prib) х6 = 42
8 row: 42 on the back of the loop.
9-12 rows: 42
13 Row: (5 SBN, ub) Х6 = 36
14 row: (4 SBN, ub) Х6 = 30
Change the thread to yellow. The end of the gray thread leave a length of centimeters 15.
15 Row: 30 SBNWe perform hoof trimming. The end of the thread Iznctri lead to the beginning of knitting (Amaguumi ring). Make sure that the thread is not stretched inside the hoof. It shall be free to lie on the inner wall of the part.
The hoof is stuffing. Fix the thread at the base of the hoof.Then put the thread in the needle and enter between the columns in the base of the first yellow row. Pierces the gasket and bring the needle back into the base ring. Fix the thread.

It is better to make two such stitches. Hide the end of the thread in the hoof:)
Continue knitting yellow thread.
16 Row: (3 SBN, UB) Х6 = 24
17-40 rows: 24 SBN
Next we will knit turning rows without lifting loops at the beginning of each next row.The paw at the giraffe at the top will be flat, but with a bevel. That sewn paws did not stick in different directions.
41 Series: Do not reach the end. The exact number of columns is difficult to name, because of the bias in the spiral the number may differ.We focus so. We turn the foot of the hoof on ourselves. On a line of a stitch of a hoof bend a “pipe”-here behind and will be the necessary column.Here’s an example on a paper tube (red arrow):


42 Series: 10 Rth, turn
43 Series: 8 Off, turn
44 Series: 6 off, turn
45 Series: 4 Off, turn
46 Series: 2 SBN
Fold the detail and tie a number of columns without a scale for both walls.
The second part of the Rotary series is the same, only start from the white arrow.
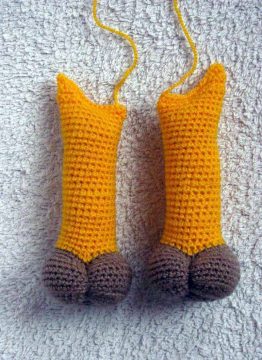
Front Paws (2 parts)
Gray thread:
1 row: In the ring 6 SBN = 6
2 row: 6 Prib = 12
3 row: (SB, prib) х6 = 18
4 row: (2 SBN, prib) х6 = 24
5 row: (3 SBN, prib) х6 = 30
6 row: (4 SBN, prib) х6 = 36
7 row: 36 on the back of the loop.
8-12 rows: 36
13 Row: (4 SBN, ub) Х6 = 30
Change the thread to yellow.
14 row: 30 SBN
We carry out a hoof duckling and continue knitting a yellow thread.
15 Row: (3 SBN, UB) Х6 = 24
16-39 rows: 24 SBN
40 row to the white arrow.

Fold along the line of the hoof stitch and tie a number of columns without a scale for both sides of the knitting.

AssemblyIn addition to the stitching of details to each other, it is necessary to perform three ducklings: eyes, nostrils and navel.
I’ll show you an example of eyes.
All other ducklings are carried out in the same way.We plan the pins of the place of future ducks.
At the bottom of the head (where the neck will then be fastened) fix the thread.
Stretch the thread through the details and bring to the place of the duck. In no case do not bind the thread. At this stage the detail should not be deformed.

Pull out the pin. Under a column we introduce a hook and seize a thread.

Stretch the thread through the details and bring to the place of the duck. In no case do not bind the thread. At this stage the detail should not be deformed.

We carry the thread through the head to where it was fastened initially. And now we are dragging.Fix the thread at the bottom where the neck will be.Here’s what happened:
The same thread makes the second eye’s duckling.
We tighten our nostrils.
Choose the places where the nostrils will be. It is better to “plant” the eye on pins to find the most successful location of the nostrils. Every inch is important here. With each shift different expressions of the muzzle are obtained.On the example of eyes:

The tail is nailed.And only after that we plan the place where the navel will be located.Bring the end of the thread from the tail. Anchoring. We deduce in a tail (or in a base of a trunk) and we tighten.

The paws are nailed.

If there are any questions, I will gladly answer.
Have a nice knitting!


