
Hello dear Amigurumi Followers
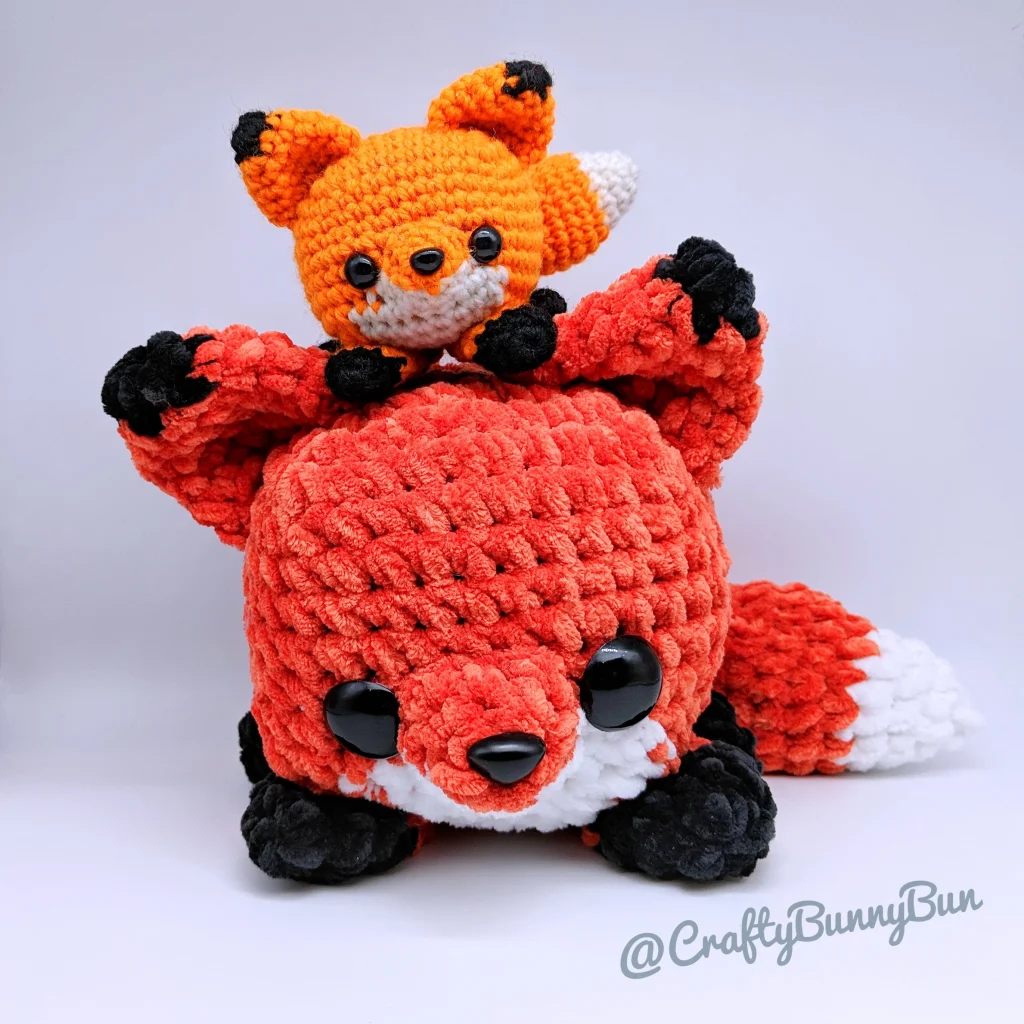
Today we share Amigurumi Cute Fox Free Pattern for you. As you know we share new free amigurumi pattern every day. The main crochets are gazelle, amigurumi bear, pola, crochet panda, penguin, giraffe, llama, pig, bunny, clown, lamb, bee, crochet unicorn, amigurumi doll, fox, penguin, dinosaur, crochet elephant, hippo, monkey, crochet cat, crochet dog and more …
Todays daily new amigurumi free crochet pattern is Amigurumi Cute Fox Free Pattern.
I want to give you some informations about this amigurumi free pattern ; Amigurumi Cute Fox Free Pattern.
Amigurumi Cute Fox Free Pattern Material
For the smaller Fox I used the following:
- 3mm crochet hook
- DK yarn in orange, black and white
- 8mm safety eyes, small triangular nose
- Tapestry needle
- Stuffing
For the larger fluffy Fox I used the following material:
- 7mm crochet hook
- Chunky Chenille yarn in orange, black and white.
- 20mm button eyes, large triangular nose
- Tapestry needle
- Stuffing
The instructions apply to both sized foxes, if there are any differences I’ll indicate them clearly.
Abbreviations (US)
- MC: Magic circle
- 2-sc inc: 2 sc in next st (increase by 1)
- 3-sc inc: 3 sc in next st (increase by 2)
- sc2tog: 2 sc together (decrease by 1)
- sc3tog: 3 sc together (decrease by 2)
Instructions
This pattern is made in a spiral of continuous rounds
To change color, use old color to do the first yarn over, then use new color to do the last yarn over and draw through both loops on hook to complete stitch. The stitch will count toward the old color but the following stitches will have the new color. To make it easier I’ll indicate the stitch where the color change happen with a comment (old color ➤ new color)
Let’s say the instructions are: sc x 6 (orange), sc (orange ➤ white) , sc (white)
It means sc x 6 orange, sc with orange for the first yarn over then do the second yarn over with white (still looks like an orange sc), then do one sc with white.
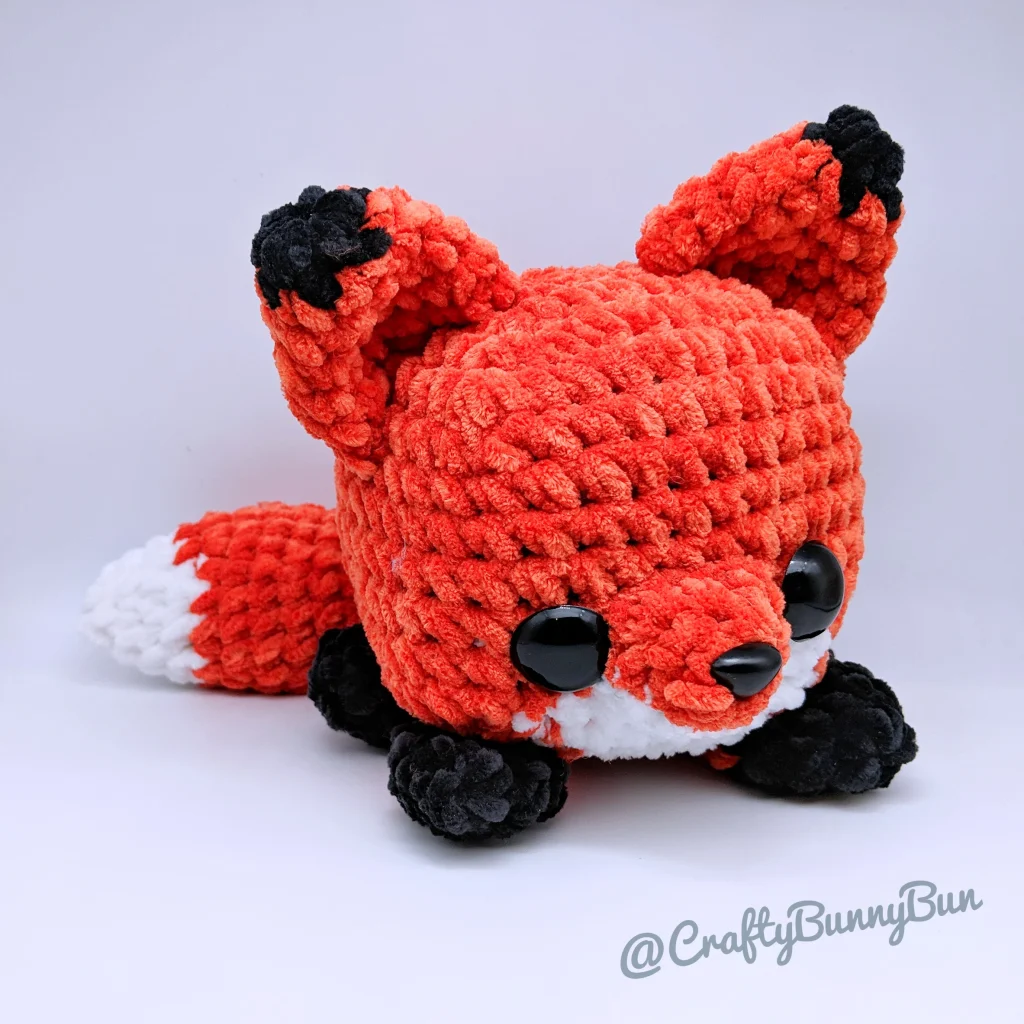
Body (make 1)
| Row # | Instructions | Sts |
| R1 | 4-sc MC | 4 |
| R2 | 3-sc inc × 4 | 12 |
| R3 | sc, 3-sc inc, [sc × 2, 3-sc inc] × 3, sc | 20 |
| R4 | sc × 2, 3-sc inc, [sc × 4, 3-sc inc] × 3, sc × 2 | 28 |
| R5 | sc × 3, 3-sc inc, [sc × 6, 3-sc inc] × 3, sc × 3 | 36 |
| R6 | sc × 4, 3-sc inc, [sc × 8, 3-sc inc] × 3, sc × 4 | 44 |
| R7 | sc × 5, sc2tog, [sc × 9, sc2tog] × 3, sc × 4 | 40 |
| R8-11 | sc × 40 | 40 |
| R12 | sc × 7 (orange), sc (orange ➤ white), sc × 5 (white), sc (white ➤ orange), sc × 26 (orange) | 40 |
| R13 | sc × 6 (orange), sc (orange ➤ white), sc × 7 (white), sc (white ➤ orange), sc × 25 (orange) | 40 |
| R14 | start with orange, sc × 4, sc3tog, sc (orange ➤ white), sc × 5 (white), sc (white ➤ orange), continue with orange, sc3tog , [sc × 7, sc3tog] × 2, sc × 3 | 32 |
| R15 | start with orange, sc × 3, sc3tog, sc (orange ➤ white), sc × 3 (white), sc (white ➤ orange), continue with orange, sc3tog, [sc × 5, sc3tog] × 2, sc × 2 | 24 |
| Stuff well. Place eyes between R11 and R12, 6 stitch holes apart. See pictures for reference. The eyes are placed low on the body intentionally. It may look too low but trust me it looks cuter this way 🙂 | ||
| R16 | start with orange, sc × 2, sc3tog, sc (orange ➤ white), sc (white), sc (white ➤ orange), continue with orange, sc3tog, [sc × 3, sc3tog] × 2, sc | 16 |
| R17 | [sc, sc3tog] × 4 | 8 |
Sew the ends together to close the gap
Snout (make 1)
Start with orange yarn:
| Row | Instructions | Sts |
| R1 | 5-sc MC | 5 |
| R2 | 2-sc inc, sc (orange ➤ white), 2-sc inc (white), sc (white ➤ orange), 2-sc inc | 8 |
| R3 | start with orange, sc, 2-sc inc, sc (orange ➤ white), [2-sc inc, sc, 2-sc inc] (white), sc (white ➤ orange), 2-sc inc (orange) | 12 |
Do one slip stitch with orange then finished off, leaving a long tail from both the orange and white yarn. Later we will be using both yarn tails to sew it into the fox body. Insert the nose into the center of the magic circle. Stuff.
Ears (make 2)
| Row # | Instructions | Sts |
| R1 | With black yarn: 5-sc MC | 5 |
| Switch to orange yarn | ||
| R2 | 2-sc inc, sc, 2-sc inc, sc, 2-sc inc | 8 |
| R3 | [sc, 2-sc inc] × 4 | 12 |
| R4 | [sc × 3, 2-sc inc] × 3 | 15 |
| R5 | [sc × 4, 2-sc inc] × 3 | 18 |
| R6 | sc × 18 | 18 |
Leave long tail. Do not stuff
Sew the end of the ears together flat as shown in the picture:

Tail (make 1)
| Row # | Instructions | Sts |
| R1 | Start with white yarn: 5-sc MC | 5 |
| R2 | 2-sc inc × 5 | 10 |
| R3 | sc × 10 | 10 |
| R4 | [2-sc inc, sc × 4] × 2 | 12 |
| Switch to orange yarn color | ||
| R5 | [2-sc inc, sc × 2] × 4 | 16 |
| R6 | [2-sc inc, sc × 3] × 4 | 20 |
| R7-8 | sc × 20 | 20 |
| R9 | [sc2tog, sc × 3] × 4 | 16 |
| R10 | sc × 16 | 16 |
| R11 | [sc2tog, sc × 2] × 4 | 12 |
| R12-13 | sc × 12 | 12 |
| R14 | [sc2tog, sc × 2] × 3 | 9 |
| R15 | sc × 9 | 9 |
| R16 | [sc2tog, sc] × 3 | 5 |
Leave long tail. Stuff very lightly don’t over-stuff.
Legs (make 4)
| Row # | Instructions | Sts |
| R1 | Start with black yarn: 5-sc MC | 5 |
| R2 | 2-sc inc × 5 | 10 |
| R3 | sc × 10 | 10 |
| Switch to orange yarn color | ||
| R4 – 7 | sc × 10 | 10 |
Leave long tail. Do not stuff
Assembly


Start by attaching the snout on the fox body between the eyes. The snout is placed on R10 at the top and R13 at the bottom. The white side should be at the bottom as in the picture. Use the orange yarn tail to attach the snout to the orange parts, use the white yarn tail to attach the snout to the white parts of the body. This way it looks more seamless.

Attach the unstuffed legs to the bottom of the fox body. You can place them as you wish. You can see how I prefer to place them in the picture on the left. Tip, use pins to see how they look like before you sew them in. Also note that I also attach the middle of the leg to the body so it stays flat to the body. So it’s not just attached on one end to the body.

Attach the tail at the back of the body on R11 and R12. If you want the tail to wrap around the body a bit more attach the tail a bit more to the body on the side. as per the picture.

Attach the ears so one end is on R3 and the other end is on R8. For extra cuteness place them so they curve a little as per the following two pictures.

Note that the other end of the ear is placed a bit further back on the side. This side view shows it better.
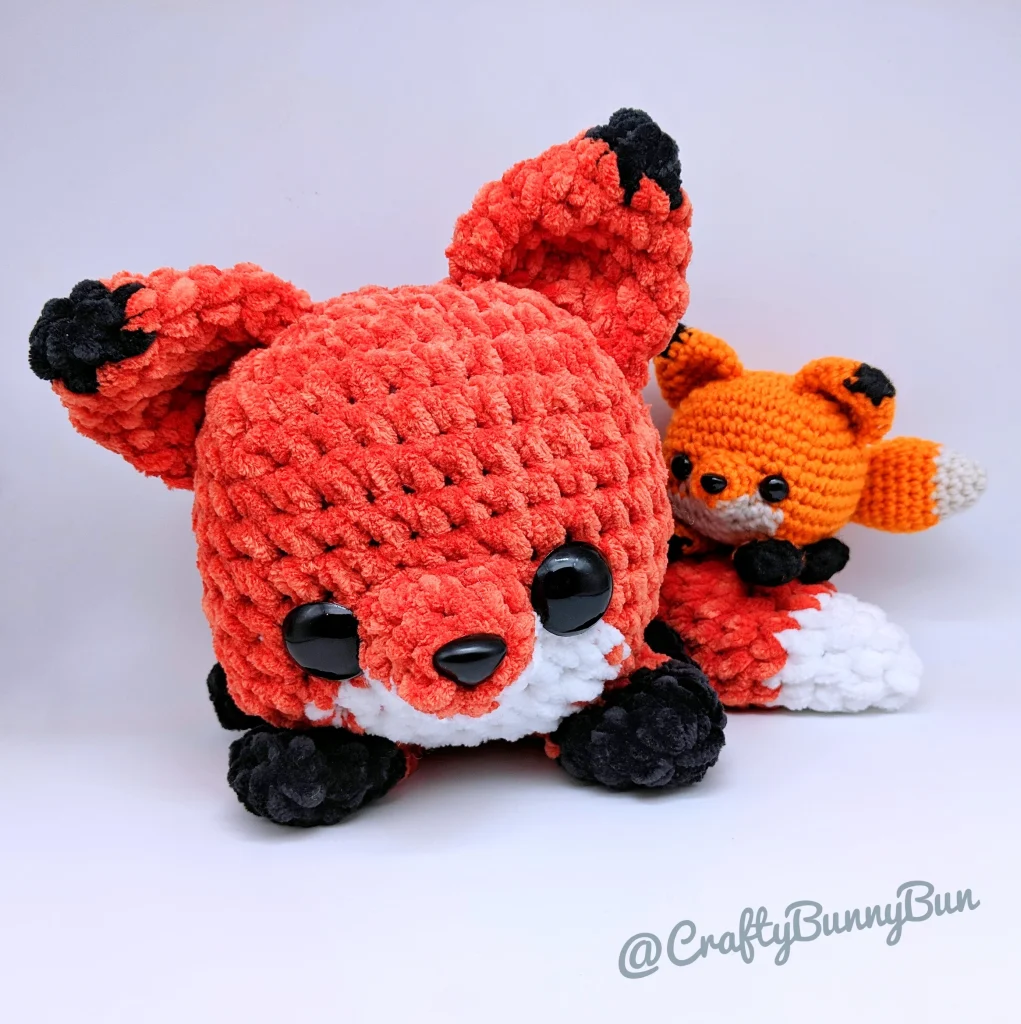
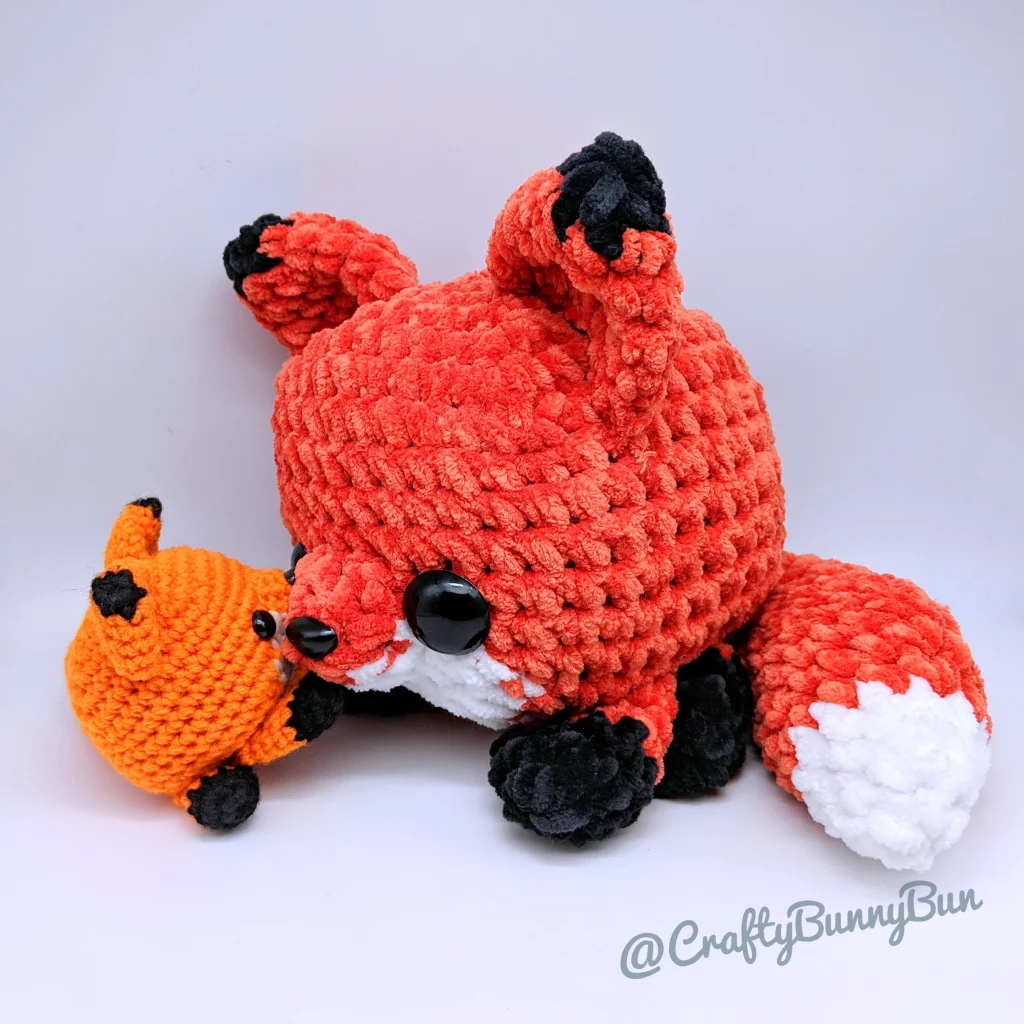
More Amigurumi Fox Ideas:


