
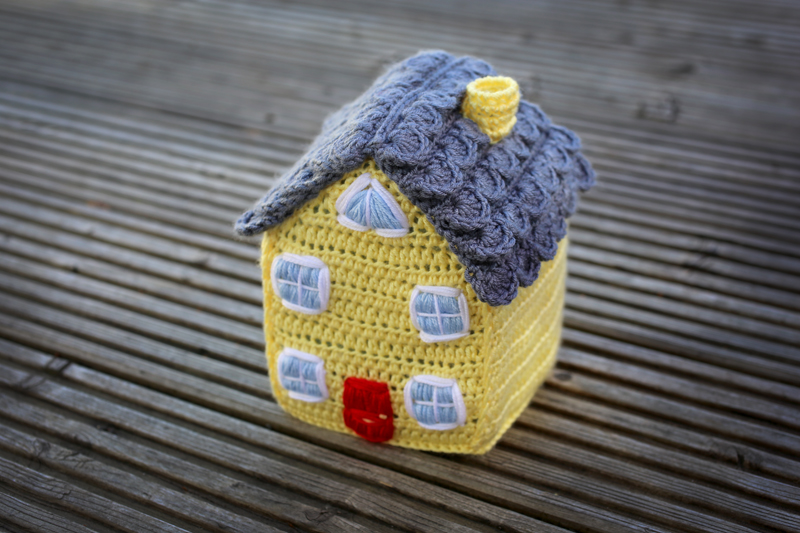
Crochet House – #BurtonYarnTrent
It’s been a busy Spring and Summer in Lime Green Land with crochet commissions, pattern testing, craft fares and Burton Yarn Trent.
So, we’re actually doing it! We’re creating Burton Upon Trent in Crochet! Many thanks to my wonderful crochet class for their hard work so far, here is a reminder for them (and a photo tutorial for the roof for anyone who’s like to have a go!) of the basic house pattern.
If you are free on a Tuesday lunch time, join me at the Brewhouse in Burton from 1-2 for just £5, check with the Boxoffice for course dates 01283 508100.
If you’d like to get involved in #BurtonYarnTrent, please send your finished houses along with your name and contact details to:
Burton Yarn Trent
Brewhouse Arts Centre,
Union Street,
Burton upon Trent,
DE14 1AA
Crochet House in UK crochet terms.
Materials
Dk yarn in main house colour, roof colour and small amounts for doors and windows.
3.5mm hook
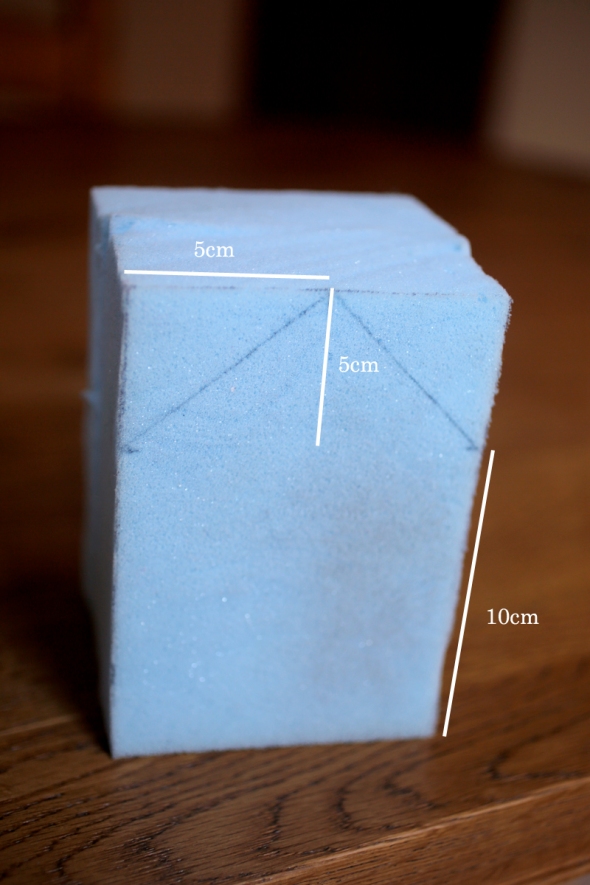
10cm x 10cm x 15 cm piece of upholstery foam. You can cut larger pieces to size with a long, thin, sharp kitchen knife.
Yarn needle
Scissors
Abbreivations
slst slip stitch
dc double crochet
htr half treble crochet
htr 2 tog half treble two together
tr treble crochet
ch chain
Pattern
Square pieces (one for base and two walls)
The number of stitches needed to make the pattern work depends on your tension.
For me, I did the following:
20ch, 2 turning chs
row 1-12 20 htr, 2 turning chs
We’re aiming to have a square of crochet that is JUST UNDER 10cm x 10cm. Its important for the square to be just under, rather than just over. Too big, and the walls will be like Nora Batty’s tights. Not a good luck. Too small, and you’ll struggle to stretch them over the foam inner.
Make sure you adjust the number of stitches and rows so you end up with a square the right size!
House Gable Ends (make 2)
20ch, 2 turning chs
row 1-12 20 htr, 2 turning chs
now for the triangular bit at the top!
row 13 (htr 2 tog) twice, 12htr, (htr 2 tog) twice, 2 turning chs
row 14 htr 2 tog, 12htr, htr 2 tog, 2 turning chs
row 15 (htr 2 tog) twice, 6htr, (htr 2 tog) twice, 2 turning chs
row 16 htr 2 tog, 6htr, htr 2 tog, 2 turning chs
row 17 (htr 2 tog) 4 times, 2 turning chs
row 18 (htr 2 tog) twice, 2 turning chs
row 19 htr 2 tog.
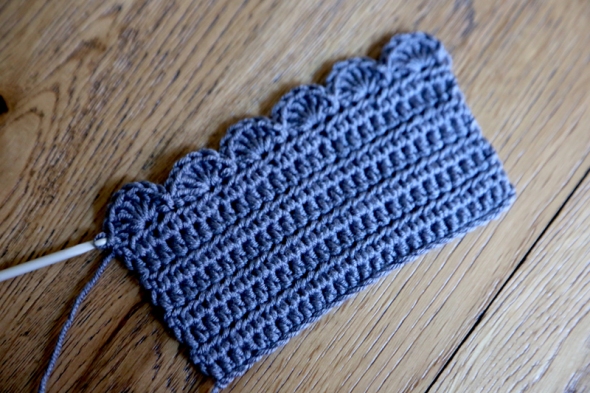
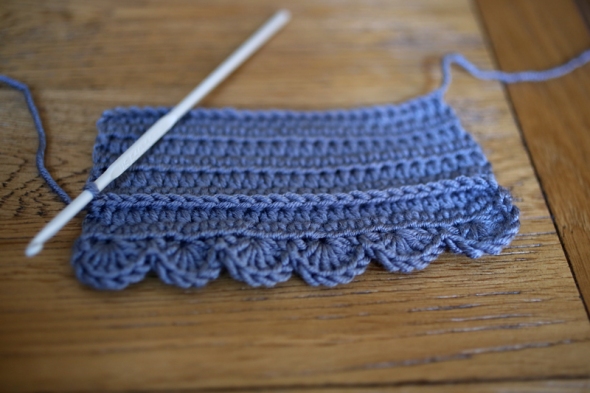
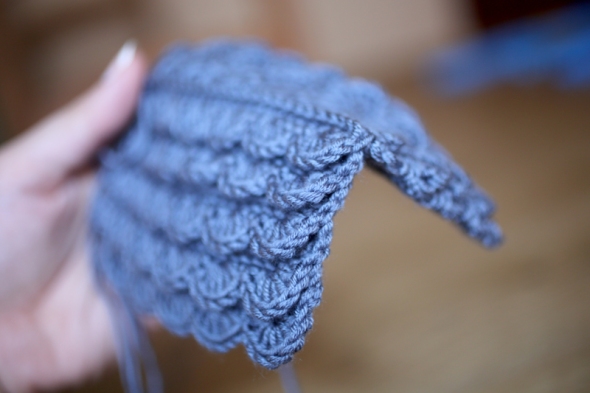
Roof (make 2)
Make a ch that is a multiple of 4, and at least 2 stitches more than your walls. For example, my walls were 20 st wide, 20 + 2 = 22. The next multiple of 4 is 24. So I made a chain of 24
Crochet 8 rows of htr, remember to so 2 turning chs after each row, but not after the last one.

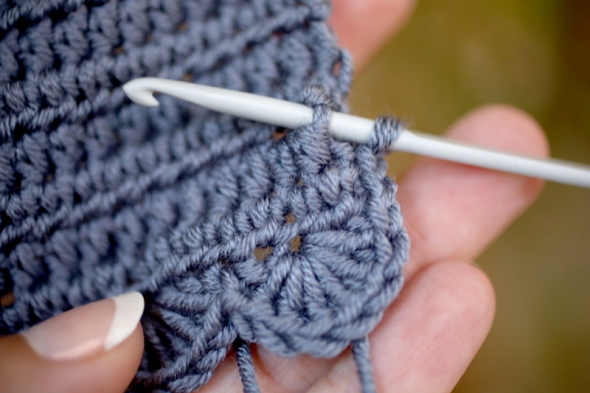
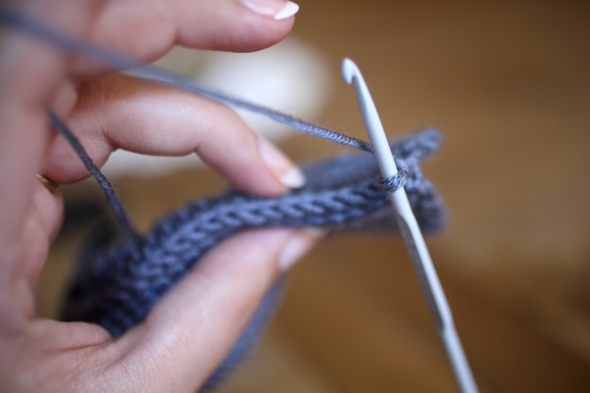
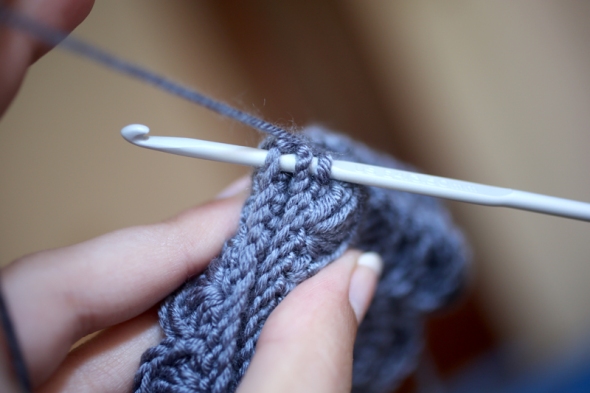
Turn work, (miss 1, 6tr, miss 1, slst) to end.


Rotate work 90 clockwise, and working up the side of the work, 2slst.
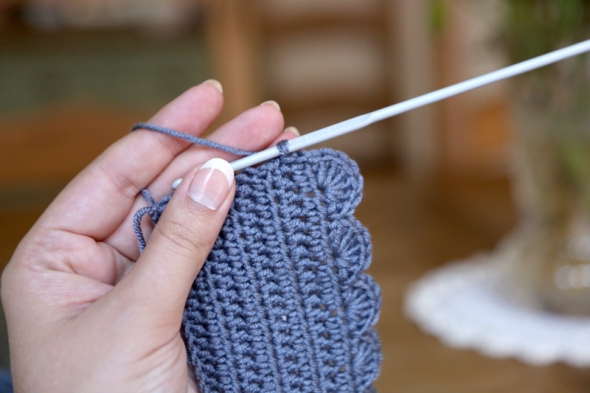
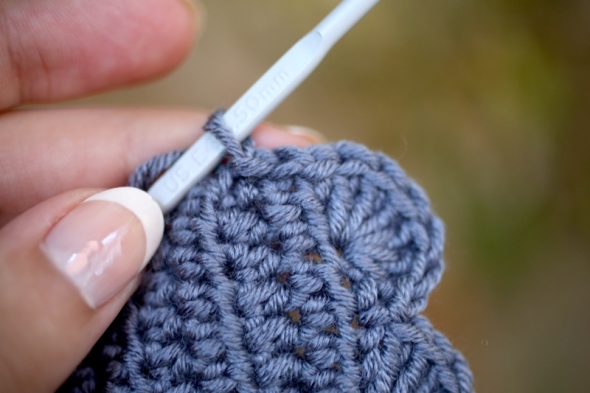
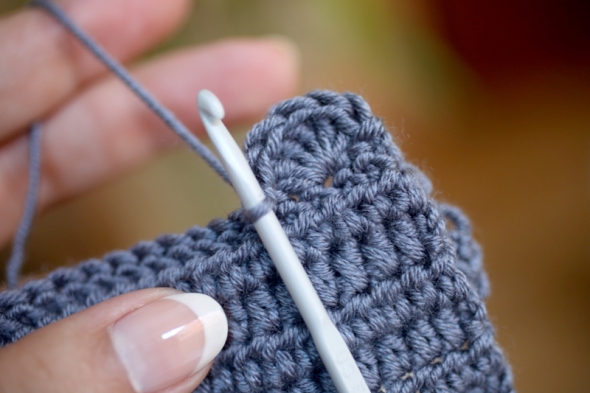
Rotate work 90 degrees clockwise again and surface crochet (this is where, with the right side facing, you insert your hook in and out of the crochet, catching 1 st, then work the dc around the stem of the stitch) 24dc between rows 6 and 7.


Turn work, (miss 1, 6tr, miss 1, slst) to end.
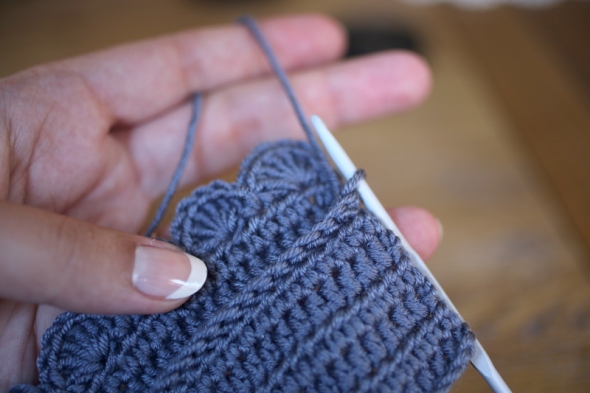
Rotate work 90 clockwise, and working up the side of the work, 2slst.
Rotate work 90 degrees clockwise again and surface crochet 24dc between rows 4 and 5.
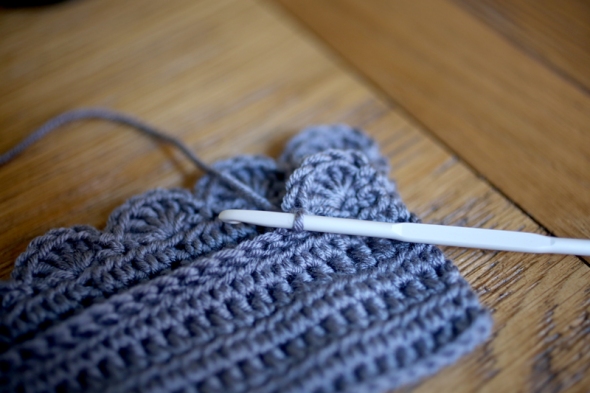
Turn work, (miss 1, 6tr, miss 1, slst) to end.
Rotate work 90 clockwise, and working up the side of the work, 2slst.
Rotate work 90 degrees clockwise again and surface crochet 24dc between rows 2 and 3.
Turn work, (miss 1, 6tr, miss 1, slst) to end.
Rotate work 90 clockwise, and working up the side of the work, 2slst.
Rotate work 90 degrees clockwise again and surface crochet 24dc on top of 1st row.
Turn work, (miss 1, 6tr, miss 1, slst) to end.
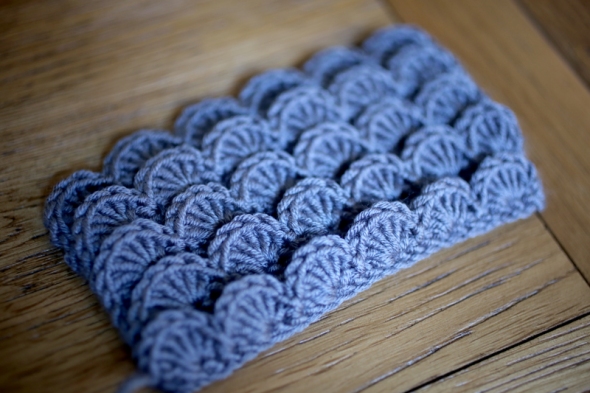
To join roof sides together, put them together, wrong side facing, and dc along the top catching both sides in each st.
Shape your foam
Join the sides of your house by dc along each side
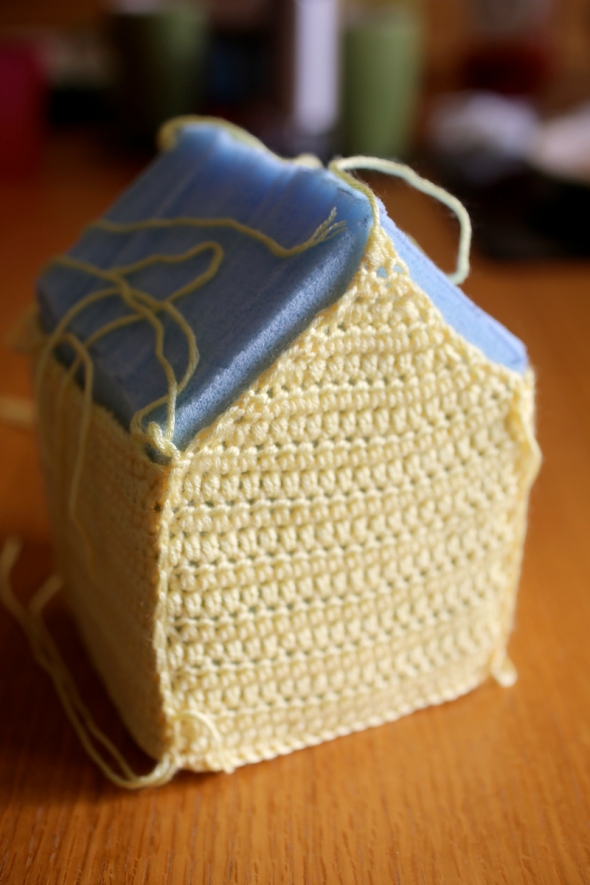
Sew on the roof

Now your basic house is complete! At this point, you can get really creative. You could either crochet or embroider the door and windows on.

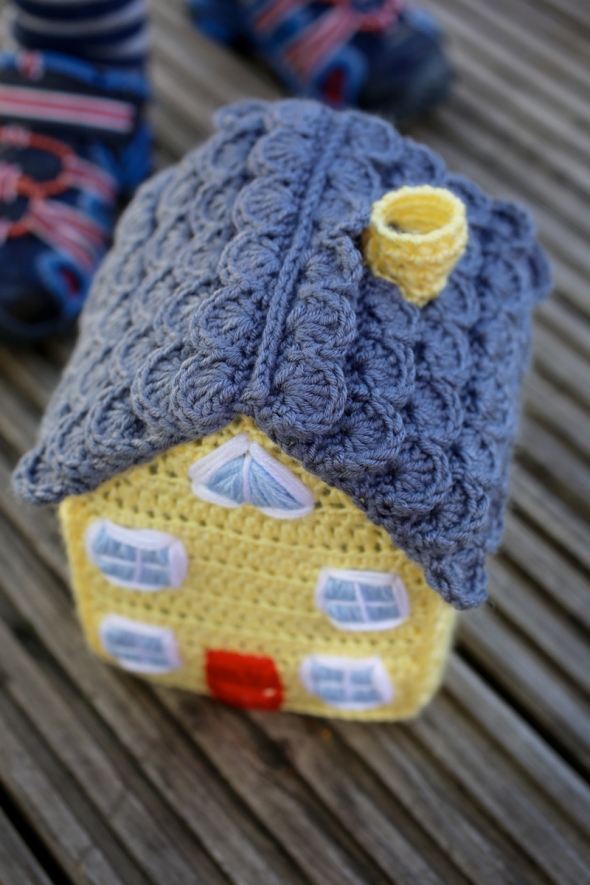
I have also added a chimney as follows:
Chimney
12ch, slst into 1st ch t make a loop.
2ch, 11htr, 2 turning chs
(2htr tog) twice, 1htr, (2htr tog) twice, 2 turning chs
2htr tog, 1htr, 2htr tog,
The sloped bottom will make your chimney sit better against the roof.
Have fun adding details to your houses, or even try something a little bit more adventurous! Upholstery foam can be easily shaped into loads of different building shapes. Enjoy!


