
Hello dear Amigurumi Followers
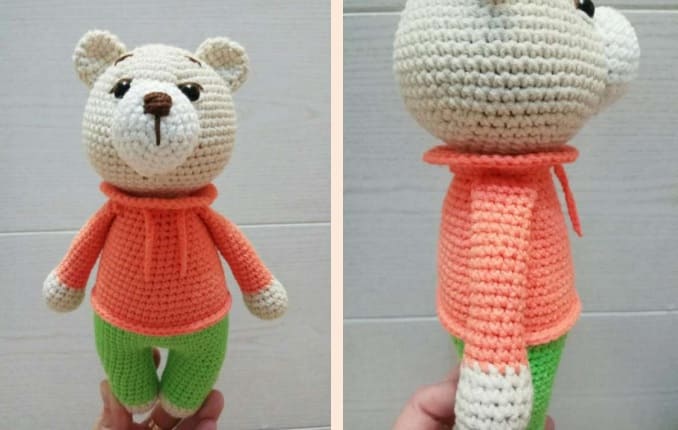
Today we share Amigurumi Bear the Benjamin Free Pattern for you. As you know we share new free amigurumi pattern every day. The main crochets are gazelle, amigurumi bear, pola, crochet panda, penguin, giraffe, llama, pig, bunny, clown, lamb, bee, crochet unicorn, amigurumi doll, fox, penguin, dinosaur, crochet elephant, hippo, monkey, crochet cat, crochet dog and more …
Todays daily new amigurumi free crochet pattern is Amigurumi Bear the Benjamin.
I want to give you some informations about this amigurumi free pattern ; Bear the Benjamin.

Materials
• Yarn “YarnArt Jeans” semi-cotton 50g / 160m, colors:
– 70 milk chocolate, a little for decoration muzzles
– 01 white, for the muzzle
– 05 cold beige, consumption 0.5 skein
– 61 coral, consumption 0.5 skein
– 60 light green neon, consumption 0.5 skein
• Hook number 2, sewing needle, scissors,
• Long needle for tightening
• Filler – holofiber
• Safety eyes or half beads with a diameter of 9 mm.
Abbreviations
MR: Magic ring
Sc: Single crochet
Ch: Chain
Inc: Increase
BLO: Back loop only
Dec: Decrease
Slst: Slip stitch
You can use completely different yarn.
The size and quality of the product will depend on this.
The toy is crocheted in a spiral for both walls of the loop, unless otherwise stated.
When the specified materials are used, the finished toy is approximately 20 cm in length.
Amigurumi Bear the Benjamin Free Pattern:
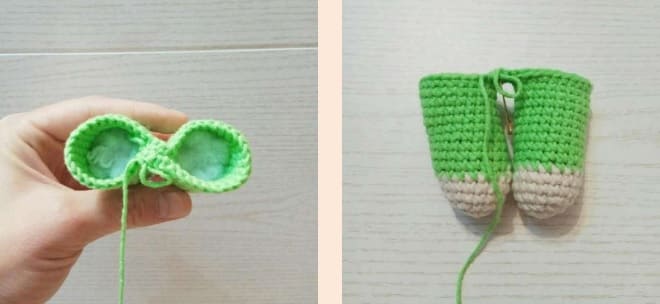
Legs and Body
We start crocheting with cold beige yarn.
Rnd 1. 6 sc in MR
Rnd 2. 6 inc (12)
Rnd 3. (1sc,inc)*6 (18)
Rnd 4-5. 18 sc (2 rows)
Change to light green neon yarn.
Rnd 6. 8sc, 2inc, 8sc (20)
Rnd 7-10. 20 sc (4 rows)
Rnd 11. 9sc, 2inc, 9sc (22)
Rnd 12-13. 22 sc (2 rows)
Rnd 14. 10sc, 2inc, 10sc (24)
Rnd 15. 24 sc
Fasten and cut the thread on the first leg.
We crochet the second leg in the same way as the first. We do not cut the thread, but continue to crochet the body.
Rnd 16. from the second leg, make a chain of 3 ch and attach to the first leg with slst.
Next, crochet 24sc on the first part, 3 sc on the chain of air loops, 24sc on the second part, 3sc on the reverse side of the chain of air loops (54sc)
In this place it is necessary to install a marker (the marker is located at the back).
Rnd 17-24. 54 sc (8 rows)
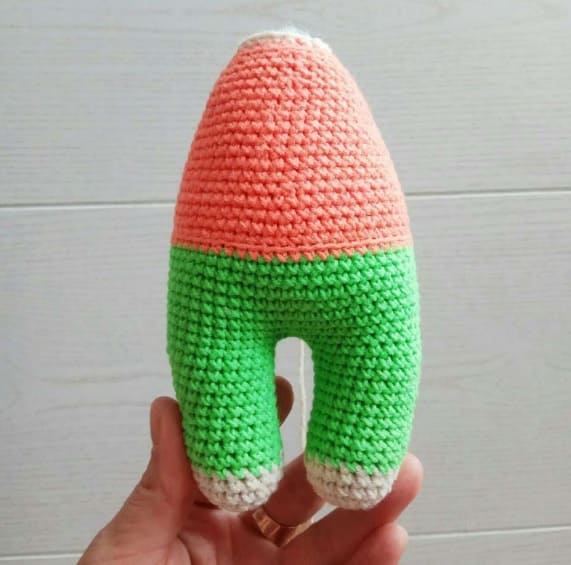
Change to coral color yarn.
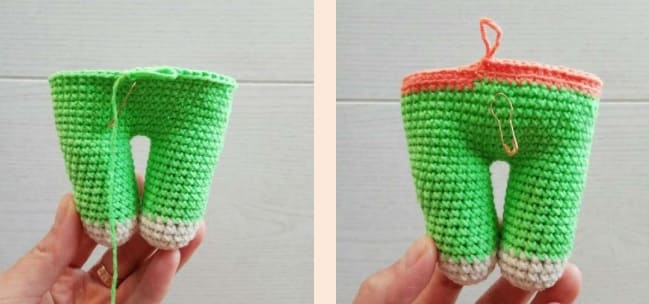
Rnd 25. 54 sc
Rnd 26. 54 sc for the BLO
Rnd 27-29. 54 sc (3 rows)
Rnd 30. (7sc,dec)*6 (48)
Rnd 31-32. 48 sc (2 rows)
Rnd 33. (6sc,dec)*6 (42)
Rnd 34-35. 42 sc (2 rows)
Rnd 36. (5sc,dec)*6 (36)
Rnd 37-38. 36 sc (2 rows)
Rnd 39. (4sc,dec)*6 (30)
Rnd 40-41. 30 sc (2 rows)
Rnd 42. (3sc,dec)*6 (24)
Rnd 43. 24 sc for the BLO
Change to cold beige yarn.
Rnd 44. (10sc,dec)*2 (22)
Stuff the body tightly. Cut the thread, the end of the thread hiding inside the details.
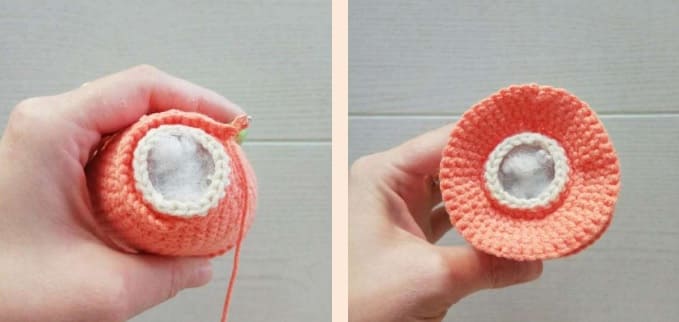
26 row, where we crocheted for the BLO, tie 1 next to the sc with a coral colored thread.
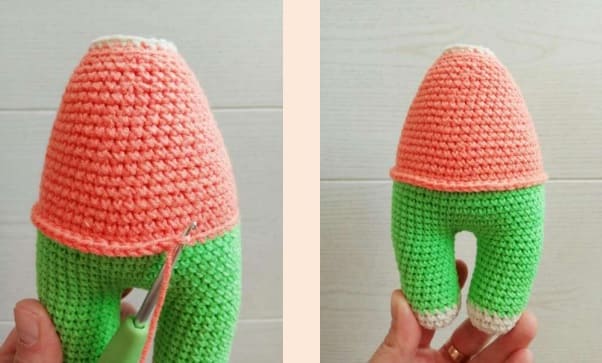
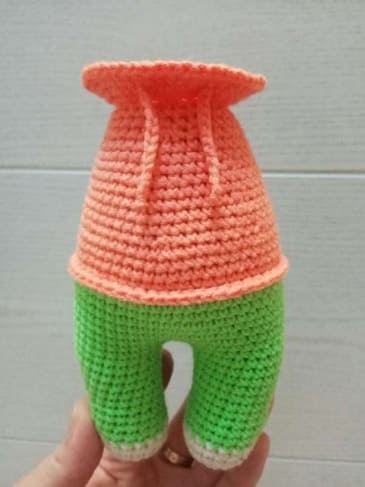
Collar
To the 43rd row, where we crochet for the BLO, attach a thread of coral color.
Rnd 1. we crochet inc from sc in each half loop row to end (48)
Rnd 2-4. 48 sc (3 rows)
Cut the thread, hide the end of the thread.
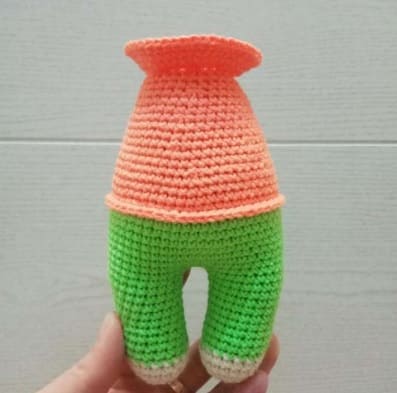
Laces
Crochet with coral yarn.
From a chain with 10 ch we will make laces for the collar.
Fasten the thread to the collar, crochet 10 ch, let’s make a knot. Repeat the same for the second lace.
We fasten the laces symmetrically in the center collar.
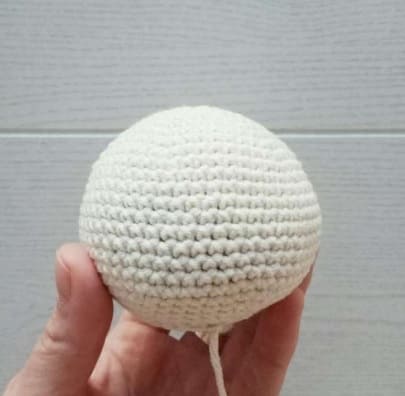
Head
We crochet with cold beige yarn.
Rnd 1. 6 sc in MR
Rnd 2. 6 inc (12)
Rnd 3. (1sc,inc)*6 (18)
Rnd 4. (2sc,inc)*6 (24)
Rnd 5. (3sc,inc)*6 (30)
Rnd 6. (4sc,inc)*6 (36)
Rnd 7. (5sc,inc)*6 (42)
Rnd 8. (6sc,inc)*6 (48)
Rnd 9. (7sc,inc)*6 (54)
Rnd 10-19. 54 sc (10 rows)
If you are using safety eyes, attach them between 10 – 11 rows. Approximate distance 8 columns between eyes.
Rnd 20. (7sc,dec)*6 (48)
Rnd 21. (6sc,dec)*6 (42)
Rnd 22. (5sc,dec)*6 (36)
Rnd 23. (4sc,dec)*6 (30)
Rnd 24. (3sc,dec)*6 (24)
Rnd 25. (10sc,dec)*2 (22)
Fill tightly. Leave the thread for sewing.
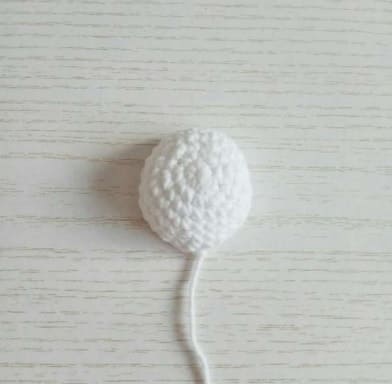
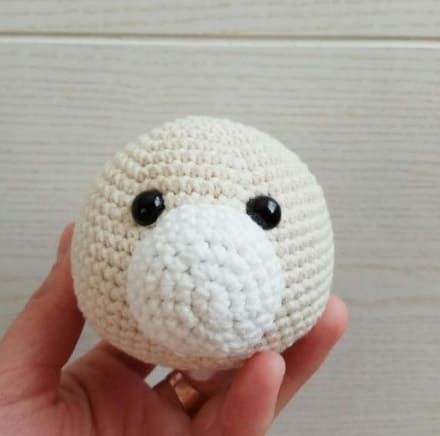
Muzzle
We crochet with white yarn.
Rnd 1. 6 sc in MR
Rnd 2. 6 inc (12)
Rnd 3. (1sc,inc)*6 (18)
Rnd 4. (2sc,inc)*6 (24)
Rnd 5-7. 24 sc (3 rows)
Leave the thread for sewing.
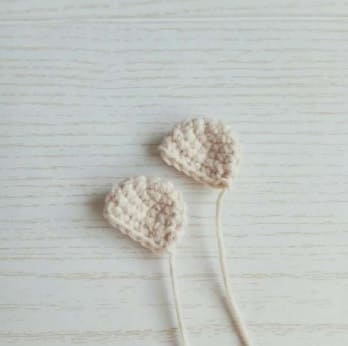
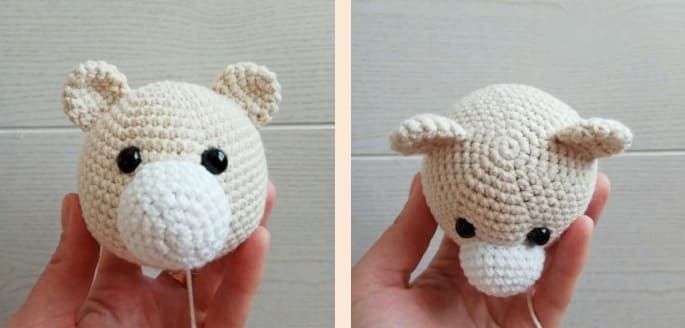
Ears (Make 2)
We crochet with cold beige yarn.
Rnd 1. 6 sc in MR
Rnd 2. 6 inc
Rnd 3. (3sc,inc)*3 (15)
Rnd 4. 15 sc
Rnd 5. (3sc,dec)*3 (12)
Do not stuff the ears. Fold in half and crochet 6sc for both loops. Leave a long thread for sewing.
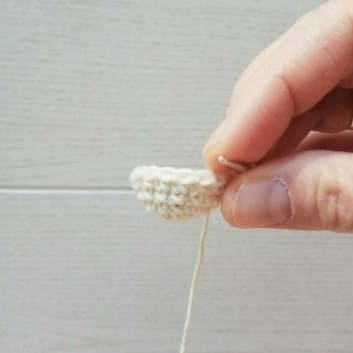
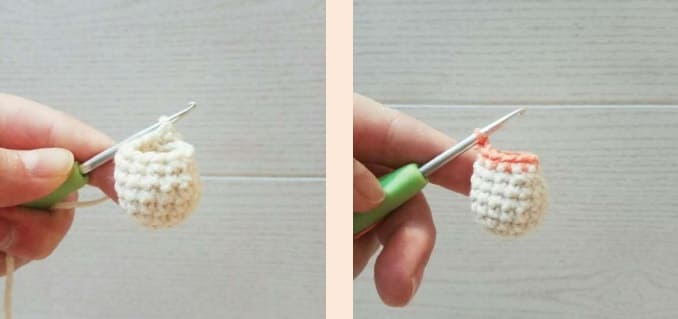
Upper legs (2 parts)
We crochet with cold beige yarn.
Rnd 1. 6 sc in MR
Rnd 2. 6 inc (12)
Rnd 3. (3sc,inc)*3 (15)
Rnd 4-6. 15 sc (3 rows)
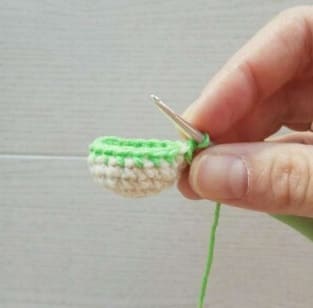
Rnd 7. (3sc,dec)*3 (12)
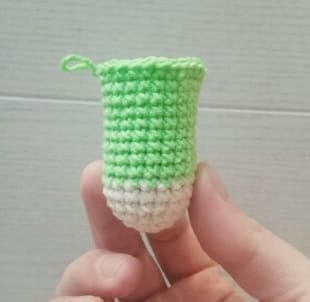
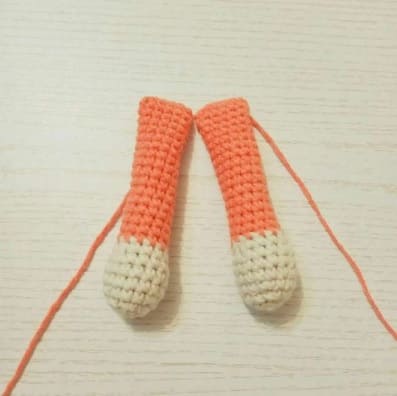
Change to coral color yarn.
Rnd 8-23. 12 sc (16 rows)
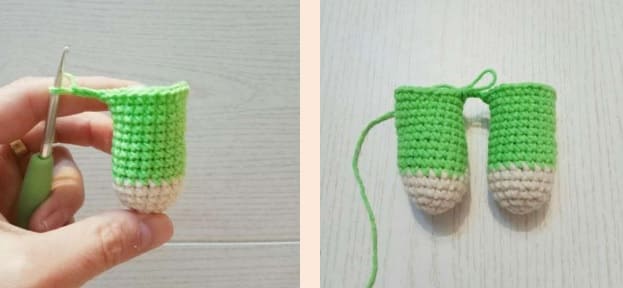
We stuff the paws in the process of crocheting: fill the bottom very tight, mid middle, top (about 1-2 cm) you can not stuff.
Fold the foot in half and connect 6sc for both loops. The second foot is crocheted in the same way.
Assembly and decoration
First, let’s draw the head of the bear.
We outline two stitch of tightening on the head of the bear: stitch 1 and 2 are located between 10 and 11 side by side, the distance between them is approximately 8 columns.
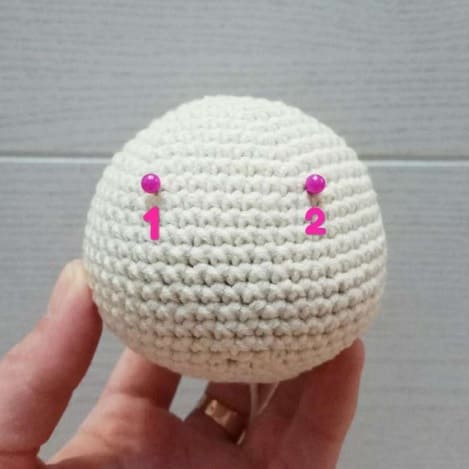
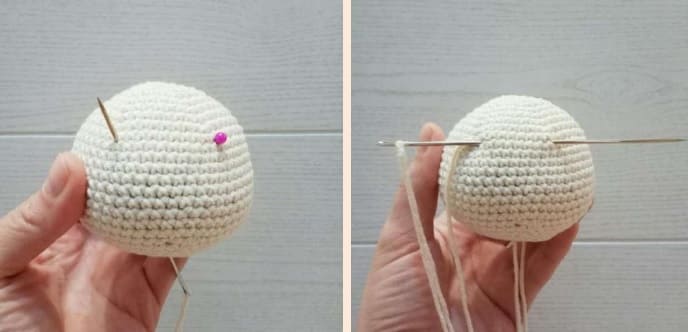
We insert a needle with a strong thread into the base of the head, we bring to the stitch of tightening the right eye.
Retreat 1 column, insert the needle, bring it to the tightening stitch of the left little eye.
Retreat 1 column, insert the needle, bring it to the base of the head.
Repeat tightening several times, constantly pulling the thread. We fix the thread.
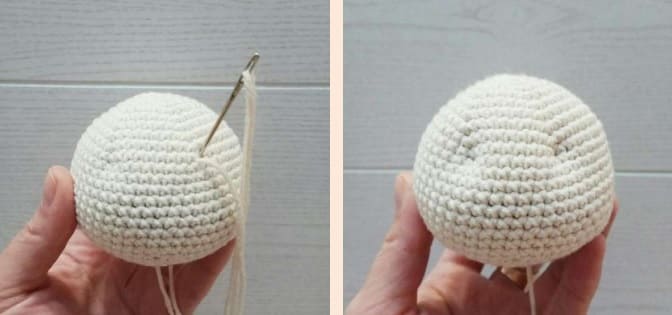
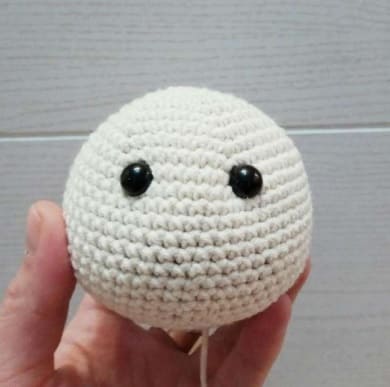
Sew on the eyes in place of the tightening.
Sew a muzzle to the head. Sew in the center lower part of the head, under the eyes, approximately between 10 – 11 (upper limit) and 19 – 20 (lower limit) rows.
During sewing, when will remain a small hole, fill the muzzle holofiber and sew to the end.
Then, sew on the ears, securing them first pins.
Ears should be placed symmetrical.
Sew on the ears approximately between 5 – 10 rows of head.
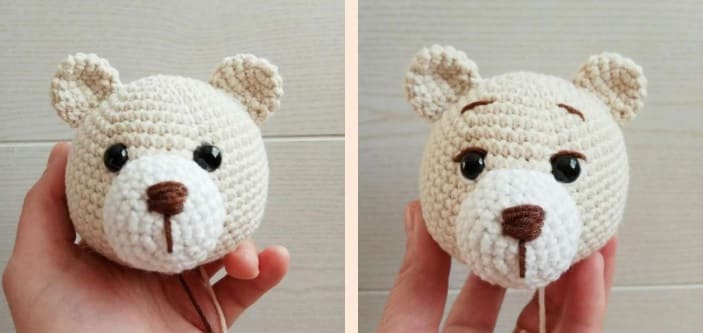
We embroider a spout with a thread of milk chocolate color, brows and eyelashes. We embroider squirrels with white yarn eyes to make the eyes look more “live”.
We sew the head and body, fastening them previously in a circle with pins.
When a small hole remains, fill the gap between the neck and head – holofiber.
You need to fill it tightly so that the head does not bend.
We sew to the end. Hide the end of the thread inside the part.
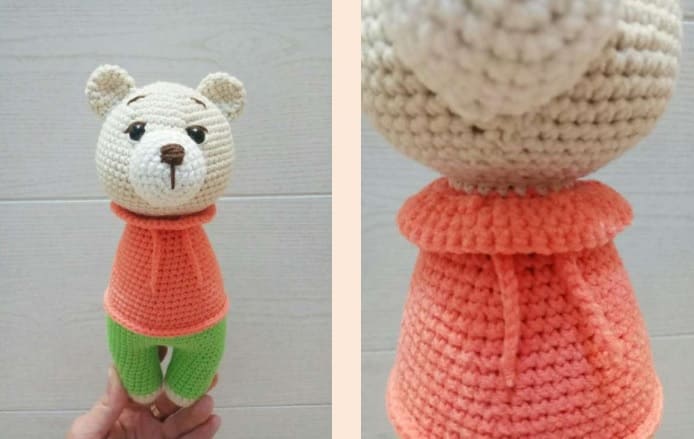
On the sides of the body we sew the upper paws, fixing them pre-pins. I sewn between 41 – 42 rows of the body.
Congratulations, the crochet teddy bear is ready.
More Amigurumi Bear Ideas:


