Hello dear Amigurumi Followers
Today we share Amigurumi Blue Hat Snowman Free Pattern for you. As you know we share new free amigurumi pattern every day. The main crochets are gazelle, amigurumi bear, pola, crochet panda, penguin, giraffe, llama, pig, bunny, clown, lamb, bee, crochet unicorn, amigurumi doll, fox, penguin, dinosaur, crochet elephant, hippo, monkey, crochet cat, crochet dog and more …
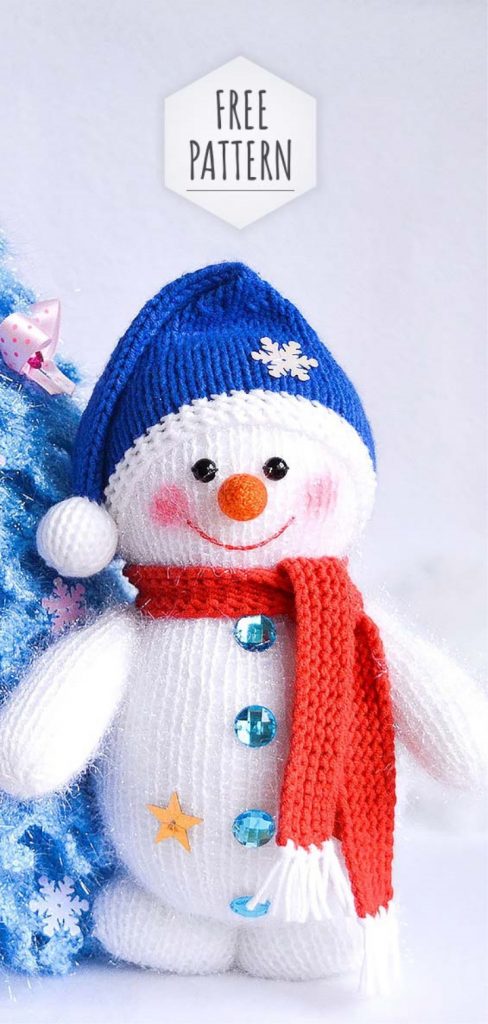
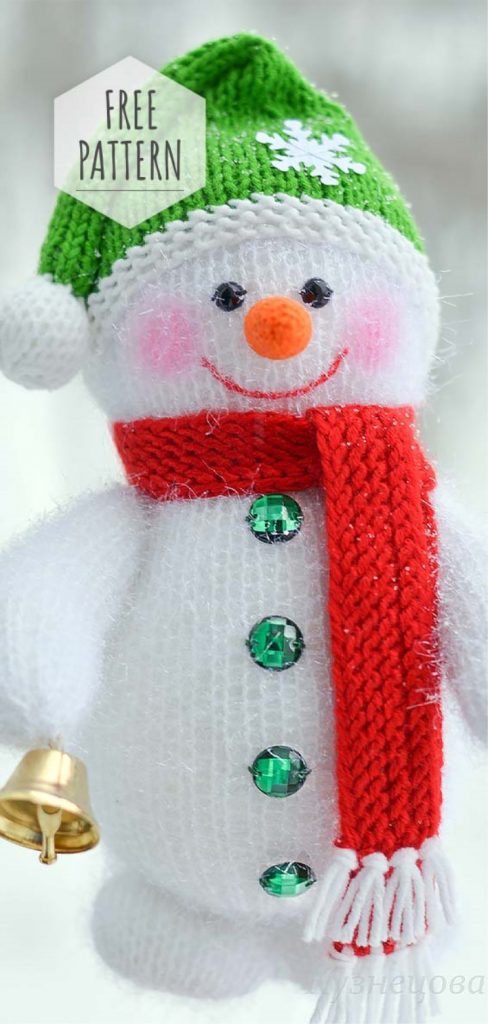
Todays daily new amigurumi free crochet pattern is Amigurumi Blue Hat Snowman.
I want to give you some informations about this amigurumi free pattern ; Blue Hat Snowman.
Required Materials:
1. Yarn “Yarn Art Christmas” White 1 Motchek
2. Yarn “Jeans” or “Cotton gold”, you can and any other similar footage for knitting scarves and hats.
3. Orange yarn for knitting carrots. I used the yarn “Pekhorka successful”
4.3-4 Nail Rhinestones
5. Sequins for decoration
6. The beads or beads for the Glashiks
7. At the request of the bell and satin ribbon to form a bow
8. Synthetic Filler
9. Spokes № 2.5 and 3 for knitting snowman and his clothes, Hook № 1.4 for knitting carrots
10. Sewing Needle
11. Artistic pastel pink, red or blush
Amigurumi Blue Hat Snowman Free Pattern
Stage 1 knitting of the body and head
I knit the body and head of the Snowman knitting Needles № 2.5. It is necessary that the cloth was dense.
1r – Collect 14 loops
2 p. – Purls Loops
3 p.-Kromovyi, from each face loop to knit on 2, Kromovyi. The result should be 26 loops.
4 p. – Purls Loops
5 p. – Kromovyi, “1 obverse, of 1 face to Knit 2” This raport repeat to the end of the series, the crown. As a result we get 38 loops
6 p. – Purls Loops.
Then 28 rows of knit face
35 p.-Kromoemno, 7 facial, 2 together face three times, 10 facial, 2 together face 3 times, 7 facial, Kromoemno
36 P-Purls loops
37 R.-Facial Loops
38 R.-Purls Loops
39 p. – Kromovyi, 7 Facial, to knit 3 times from the front loops on 2 loops, 10 facial loops, to knit three times from 3 loops on 2 loops, 7 obverse, Kromovyi.
It turns out in this series we go back to the number of loops 38 and Ezhto already we start the head
Touch the front surface of 19 rows
58 the P.-Kromoemno, “2 front, 2 together front” repeat to the end of the series, the crown. You must have 29 loops left
59 p.-Purls Loops
60 p. – Cutting, “1 obverse, 2 together obverse”, Kromoskno. The result will be 20 loops.
61 p.-Purls Loops
62 p.-Projazat 2 together front. There will be 10 loops.
All loops to translate on a thread. Sew the back seam.
As I stitch look at the picture. First, catch the needle arc faces. Located directly next to the crown and then an arc of persons. On the other side of the seam, etc. stitching is necessary without missing a single thread, i.e. connecting sequentially one row with another, working with a right-to-left needle.
Then I erase the detail. I erase all the details of the snowman before packing, wash cap, scarf. In the process of washing all the loops are leveled, the cloth is ennobling. And of course it becomes cleaner besides. After all, small impurities are possible in the process of mating, as well as the yarn that we buy, often until the buyer wait is not so clean as it should be.
Stage 2 knitting handles and legs
Handles (2 identical detki)
Dial on the spokes № 2.5 16 loops. Knit face stitch 25 rows. Then two reverse together and move the remaining loops on the thread. Stitch is similar to a calf. Loops that are on a thread, addictive. Washing of handles on request. After drying we carry out packing.
I sew usually thread, which is knitting handles in the process. That is, when the knitting handles and I translate loops on the thread, then I tear off the thread, leaving it more authentic, to sew the handle and then it in a circle to walk and pull the upper open part of the handle and it to sew the handle to the calf.
Legs (2 parts)
Type 17 loops on the spokes № 2.5.
1 p.-Purls Loops
2 p.-Kromovyi, “1 front, 2 front of the loop” and so to the end of a series of knit, Cromovyi. As a result, there should be 24 loops.
Next, knit 10 rows of facial smoothness.
Close loops.
I’m closing the spokes. I divide the loops on 12 and 12 on two spokes and close them on 2 together. For this I take the third spoke. It turns out that one shovchik already at me is ready and then there is only a lateral shovchik of a leg to make. I sew the leg, erase, dry and fill, bring the open part. Thread at stitching take such lengths that they could then pull the leg and sew the leg to the calf.

Step three. Knitting caps and scarvesThe next stage before the beginning of knitting caps I hold packing of handles, legs and a body with a head. After stuffing my body and head weighs about 85-90 g. Significantly changes in size compared to knitted billet.After stuffing I draw the thread hemophilia to the neck area (I have a hint seam in a circle stretch it on the last row of the neck in front of the beginning of the head and near the seam on the back then tighten the thread tie on the knots and I will dismiss the thread in the center of the head-hiding in the filler.I also stuffing pens and legs and bring open holes in the details.Then I start knitting a cap. Usually for a beanie I use a yarn “jeans” (white), colour also “jeans”, “Cotton Gold” or “Alize cashmere”. Knitting cap Knitting № 3. I’ll describe how I knit. But in general the number of loops of your cap will depend on how tightly the head is stuffed and what will be girth. I’ve already tied a lot of snowmen, so I know how much to recruit. But you will be able to precisely define only by an experienced way. If suddenly the first hat does not quite appear in size-do not worry. On it already adjust and link the new. And under the first cap will link a new snowman.
Cap.
When changing the threads in the CAP, consider that the cap should be sewn, so do not tear the threads under the root.Draw a white thread 48 loops. There are 4 rows of the dress binding. Attach the thread of the main color (red, blue, green, etc. if desired). And in this row I increase the number of loops up to 50-51.Knit 14 rows of front smooth. The next row: the Crown, “2 facial, 2 together front” so knit to the end of the row, the crown. Knit without decreases three rows. Then we start to form the top of the CAP:Lower in each second row (in the front rows) on both sides of 1 loop and so until the spokes will not be 12-13 loops.I do so: I touch the Crown, 1 front, then 2 together front, knit to the last 4 loops and at the end of knitting again 2 together front, 1 face and CrownWhen loops on a spoke 12-13 remain (it depends on that was them initially at me 50 or 51), we attach a white thread and in this first row with a white thread (in a lyceum) we increase the number of loops to 16. Knit straight 7 rows. Then we touch the two loops together the front and the remaining loops are translated on a thread. Sew Cap. Where the white part is sewn with white thread, the colored part is sewn together with the colored thread. Stitch is similar to that of the body and handles and legs (for the jumpers of the front loops of the first from the crown on both sides).When the cap is sewn, fill the pompom and bring it in the base to give a round shape. I do not refuel the thread, as it is then fastened to the cap on the snowman.
Scarf.
I use the yarn “gin” or “Cotton Gold”, “Alize cashmere”.I dial on the spokes № 2.5 98-100 loops and knit knitting 8 rows. Then I close the loops. I’m doing fringe. You can make Pompas on the ends of the scarf.
Stage 4 knitting spoutThe spout I knit from the yarn “Pekhorka successful” crochet 1.4. In a sliding loop 7 SBN, then on a spiral in each SBN to get 2 SBN-Total already we have 14 SBN. Then knit 7 rows of 14 SBN without increments-decreases. And then we have to start to reduce the spout to be like a carrot.I do this:First, reduce the three loops (2nd together, 3SBN, 2 together, 3 SBN, 2 together, 2SBN) remains 11 loopsI begin packing gradually, as then the aperture will decrease.Next series 11SBNThen again 3 Ubavki (2 together, 2SBB, 2 together, 2SBN and 2 together, 1 SBN) and do not forget to fill gradually. Twisting the filler tightly and stuffing the needle-shershatki.
Again the Ubavoki: 2 together, 1SBN, 2 together and I then loops bring the remaining and thread through the center of the tip pierce through the carrot and I will throw in a row for the stitching it to the face. I’m pulling on the second row of carrots, where the number of loops has increased from 7 to 14.But I recommend in the process to adjust the length of carrots on your own, as the yarn may differ from my thickness and each has its own density of knitting. My carrots are about 3 cm long

Stage 5 Snowman Assembly and Design
So, let’s start assembling the snowman. All the details should be at your full and open edges are tightened. How I’m pulling the pens. I make both handles in a circle applying them to a meta of the first and second decreases and increments for a neck and accordingly penultimate and last decreases (the second handle). Look at the snowman’s body and find these places in the neck area and symmetrically from the back seam attach the handles and sew as the handles in any toy are nailed. You look like the first photo. When the handles are sewing, pay attention to the seam of the handle. Put it inside and downwards, that then it was not visible. The snowman handles stick out. I fasten the threads, but do not cut and continue to stick the handles to the calf, so that they were beautiful and did not stick.For this purpose I stick a needle in a handle in a shoulder as though in a place where usually do grafting). I’m pulling the inside out and putting a thread on the second photo. Then I retreat half a centimeter and I stick in a handle and further in a body through and through the second handle, having deduced a thread in a shoulder of the second handle symmetrically as well as on the first. Evenly hold the handles along the calf symmetrically.Then again I stick in a half-centimeter from a place where has stretched a thread and piercing through a handle, a calf vyvovku again in the first handle in the same place whence has entered and again through a calf in the second handle and then I press a thread and handles are pressed to a calf. Don’t stretch your! Adjust the tension so that the handles do not stick and there are no seats pressed in the shoulder. It should be a little obvious that you brought a plachiko there. And then the needle Shershatkoj (which sew) can fix the filler from the inside. When everything is adjusted take the thread somewhere under the handle and fasten. Thread on the second handle also fasten and take away in a body deep. The pens are sewn.The legs are nailed. I find the 18th row on the back seam and on it.


